Windows Insider Preview 10074 + VS2015 RC時点の情報です
Windows ストアアプリの時代からおしゃれなダイアログを出そうと思うと自作しかなかった感じですが、UWP appからはContentDialogという素敵なコントロールが追加されました。
以下のようにXAMLにContentDialogを定義して
<Page
    x:Class="App28.MainPage"
    xmlns="http://schemas.microsoft.com/winfx/2006/xaml/presentation"
    xmlns:x="http://schemas.microsoft.com/winfx/2006/xaml"
    xmlns:local="using:App28"
    xmlns:d="http://schemas.microsoft.com/expression/blend/2008"
    xmlns:mc="http://schemas.openxmlformats.org/markup-compatibility/2006"
    mc:Ignorable="d">
    <Page.BottomAppBar>
        <CommandBar>
            <AppBarButton Label="ShowDialog" Icon="Accept" Click="AppBarButton_Click" />
        </CommandBar>
    </Page.BottomAppBar>
    <Grid Background="{ThemeResource ApplicationPageBackgroundThemeBrush}">
        <ContentDialog x:Name="Dialog" Title="画像">
            <Image Source="Assets/SplashScreen.png" />
        </ContentDialog>
    </Grid>
</Page>
コードを以下のように書くと
public sealed partial class MainPage : Page
{
    public MainPage()
    {
        this.InitializeComponent();
    }

    private async void AppBarButton_Click(object sender, RoutedEventArgs e)
    {
        var ignore = this.Dialog.ShowAsync();
        await Task.Delay(5000);
        this.Dialog.Hide();
    }
}
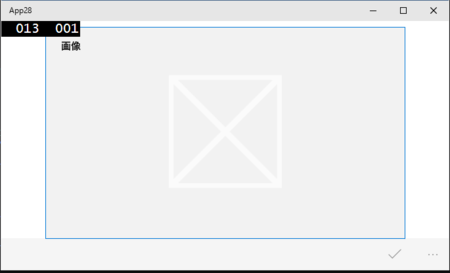
5秒間こんな感じでダイアログが表示されます。

OK/Cancelボタンの付け方
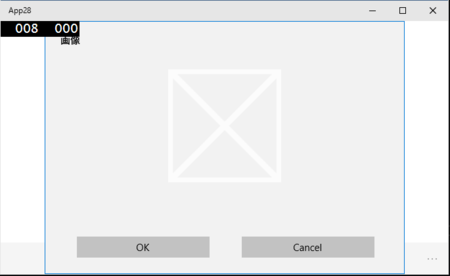
このままだとOKもCancelもへったくれもないのでつけていきます。IsPrimaryButtonEnabledでPrimaryButtonを表示して、IsSecondaryButtonEnabledでSecondaryButtonを表示します。PrimaryButtonTextとSecondaryButtonTextで表示するテキストを設定できます。
<Page
    x:Class="App28.MainPage"
    xmlns="http://schemas.microsoft.com/winfx/2006/xaml/presentation"
    xmlns:x="http://schemas.microsoft.com/winfx/2006/xaml"
    xmlns:local="using:App28"
    xmlns:d="http://schemas.microsoft.com/expression/blend/2008"
    xmlns:mc="http://schemas.openxmlformats.org/markup-compatibility/2006"
    mc:Ignorable="d">
    <Page.BottomAppBar>
        <CommandBar>
            <AppBarButton Label="ShowDialog" Icon="Accept" Click="AppBarButton_Click" />
        </CommandBar>
    </Page.BottomAppBar>
    <Grid Background="{ThemeResource ApplicationPageBackgroundThemeBrush}">
        <ContentDialog x:Name="Dialog" Title="画像"
                       IsPrimaryButtonEnabled="True"
                       PrimaryButtonText="OK"
                       IsSecondaryButtonEnabled="True"
                       SecondaryButtonText="Cancel">
            <Image Source="Assets/SplashScreen.png" />
        </ContentDialog>
        <TextBlock x:Name="TextBlockStatus"
                   Style="{ThemeResource HeaderTextBlockStyle}"
                   HorizontalAlignment="Center" />
    </Grid>
</Page>
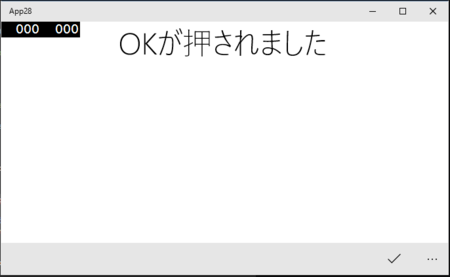
これで以下のようにコードを書くことで、OKとCancelで処理を分けることが出来ます。
private async void AppBarButton_Click(object sender, RoutedEventArgs e)
{
    var result = await this.Dialog.ShowAsync();
    if (result == ContentDialogResult.Primary)
    {
        // OK
        this.TextBlockStatus.Text = "OKが押されました";
    }
    else if (result == ContentDialogResult.Secondary)
    {
        // Cancel
        this.TextBlockStatus.Text = "Cancelが押されました";
    }
    else
    {
        // ??
        this.TextBlockStatus.Text = "その他の方法で閉じられました";
    }
}


そのほか
PrimaryButtonClick/SecondaryButtonClickイベントやPrimaryButtonCommand/SecondaryButtonCommandプロパティを使って処理をハンドリングすることもできます。結構柔軟に使えそうです。