Windows 8 CP時点の情報に基づいて書いてます。
ということで、Windows 8の目玉?機能のセマンティックズームを作ってみようと思います。グループ化されたアイテムをズームアウトすると素敵に見えるあれですね。
データ構造
とりあえずカテゴリと、カテゴリの所属するアイテムみたいな関係のクラスを定義します。クラス図でいうとこんな感じですね。

コードは以下のような感じで。
namespace SemanticZoomSampleApp
{
    using System.Collections.Generic;
    using System.Linq;

    public class Category
    {
        public string Name { get; set; }

        public IEnumerable<Item> Items { get; set; }

        // ダミーデータ作成
        public static IEnumerable<Category> CreateCategories()
        {
            return Enumerable.Range(0, 20)
                .Select(i => new Category
                {
                    Name = string.Format("カテゴリ{0:00}", i),
                    Items = Enumerable.Range(1, 5)
                        .Select(j => new Item { Name = string.Format("Item{0:00}-{1:00}", i, j) })
                });
        }
    }

    public class Item
    {
        public string Name { get; set; }
    }
}
何の変哲もない階層構造をもったクラスです。
セマンティックズームコントロール
セマンティックズームを実現するにはSemanticZoomコントロールを使います。このコントロールにはZoomedInViewとZoomedOutViewというプロパティがあり、そこに拡大時と縮小時の見た目を定義します。因みに何でも定義できるわけではなくて下記のような実装するのが若干めんどくさそうなインターフェースを実装してないといけません。
using System;

namespace Windows.UI.Xaml.Controls
{
    public interface ISemanticZoomInformation
    {
        bool IsActiveView { get; set; }
        bool IsZoomedInView { get; set; }
        SemanticZoom SemanticZoomOwner { get; set; }
        void CompleteViewChange();
        void CompleteViewChangeFrom(SemanticZoomLocation source, SemanticZoomLocation destination);
        void CompleteViewChangeTo(SemanticZoomLocation source, SemanticZoomLocation destination);
        void InitializeViewChange();
        void MakeVisible(SemanticZoomLocation item);
        void StartViewChangeFrom(SemanticZoomLocation source, SemanticZoomLocation destination);
        void StartViewChangeTo(SemanticZoomLocation source, SemanticZoomLocation destination);
    }
}
既存のコントロールでこのインターフェースを実装しているのがListViewとGridViewになります。自分で作るとしたらListViewBaseクラスを継承して作ることになりますが普通は無いでしょう。ということでここでもGridViewを使うことにします。
拡大時の表示を作ろう
まずはデフォルトの挙動だとZoomedInViewが表示されるので、その時の見た目を定義します。
<Page
    x:Class="SemanticZoomSampleApp.BlankPage"
    xmlns="http://schemas.microsoft.com/winfx/2006/xaml/presentation"
    xmlns:x="http://schemas.microsoft.com/winfx/2006/xaml"
    xmlns:local="using:SemanticZoomSampleApp"
    xmlns:d="http://schemas.microsoft.com/expression/blend/2008"
    xmlns:mc="http://schemas.openxmlformats.org/markup-compatibility/2006"
    mc:Ignorable="d">

    <Grid Background="{StaticResource ApplicationPageBackgroundBrush}">
        <SemanticZoom>
            <SemanticZoom.ZoomedInView>
                <GridView></GridView>
            </SemanticZoom.ZoomedInView>
        </SemanticZoom>
    </Grid>
</Page>
そして、このGridViewにデータを紐づけるだめのCollectionViewSourceを指定します。CollectionViewSourceはPageのリソースとして定義します。リソースとして定義したら、GridViewのItemsSourceとバインドします。
<Page
    x:Class="SemanticZoomSampleApp.BlankPage"
    xmlns="http://schemas.microsoft.com/winfx/2006/xaml/presentation"
    xmlns:x="http://schemas.microsoft.com/winfx/2006/xaml"
    xmlns:local="using:SemanticZoomSampleApp"
    xmlns:d="http://schemas.microsoft.com/expression/blend/2008"
    xmlns:mc="http://schemas.openxmlformats.org/markup-compatibility/2006"
    mc:Ignorable="d">
    <Page.Resources>
        <CollectionViewSource
            x:Name="collectionViewSource"
            IsSourceGrouped="True"
            ItemsPath="Items" />
    </Page.Resources>
    <Grid Background="{StaticResource ApplicationPageBackgroundBrush}">
        <SemanticZoom>
            <SemanticZoom.ZoomedInView>
                <GridView ItemsSource="{Binding Source={StaticResource collectionViewSource}}">
                </GridView>
            </SemanticZoom.ZoomedInView>
        </SemanticZoom>
    </Grid>
</Page>
そして、コードビハインドでCollectionViewSourceにデータを設定します。ここではOnNavigatedToメソッドでデータを設定します。
using Windows.UI.Xaml.Controls;
using Windows.UI.Xaml.Navigation;

namespace SemanticZoomSampleApp
{
    public sealed partial class BlankPage : Page
    {
        public BlankPage()
        {
            this.InitializeComponent();
        }

        protected override void OnNavigatedTo(NavigationEventArgs e)
        {
            // データの設定
            this.collectionViewSource.Source = Category.CreateCategories();
        }
    }
}
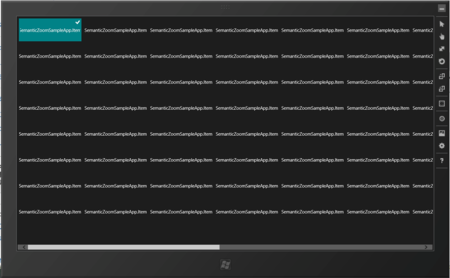
この状態で実行すると、デフォルトの見た目でGridViewにアイテムが表示されます。

この見た目ではあんまりなのでDataTemplateを適用したりグルーピングを有効にしたりします。グルーピングを有効にするにはGridViewのGroupStyleプロパティを設定します。
<Page
    x:Class="SemanticZoomSampleApp.BlankPage"
    xmlns="http://schemas.microsoft.com/winfx/2006/xaml/presentation"
    xmlns:x="http://schemas.microsoft.com/winfx/2006/xaml"
    xmlns:local="using:SemanticZoomSampleApp"
    xmlns:d="http://schemas.microsoft.com/expression/blend/2008"
    xmlns:mc="http://schemas.openxmlformats.org/markup-compatibility/2006"
    mc:Ignorable="d">
    <Page.Resources>
        <CollectionViewSource
            x:Name="collectionViewSource"
            IsSourceGrouped="True"
            ItemsPath="Items" />
    </Page.Resources>
    <Grid Background="{StaticResource ApplicationPageBackgroundBrush}">
        <SemanticZoom>
            <SemanticZoom.ZoomedInView>
                <GridView
                    ItemsSource="{Binding Source={StaticResource collectionViewSource}}">
                    <GridView.ItemTemplate>
                        <DataTemplate>
                            <!-- 個々のアイテムのテンプレート -->
                            <StackPanel Width="250" Height="250">
                                <Rectangle Width="250" Height="200" Fill="Blue" />
                                <TextBlock Text="{Binding Name}" Style="{StaticResource ItemTextStyle}" />
                            </StackPanel>
                        </DataTemplate>
                    </GridView.ItemTemplate>
                    <!-- グループの設定 -->
                    <GridView.GroupStyle>
                        <GroupStyle>
                            <GroupStyle.Panel>
                                <ItemsPanelTemplate>
                                    <!-- グルーピングされた要素の配置に使うパネル -->
                                    <VariableSizedWrapGrid
                                        Orientation="Vertical"
                                        MaximumRowsOrColumns="2"
                                        Margin="0,0,80,0" />
                                </ItemsPanelTemplate>
                            </GroupStyle.Panel>
                            <GroupStyle.HeaderTemplate>
                                <!-- グループのヘッダーのテンプレート -->
                                <DataTemplate>
                                    <TextBlock
                                        Text="{Binding Name}"
                                        Style="{StaticResource SubheaderTextStyle}" />
                                </DataTemplate>
                            </GroupStyle.HeaderTemplate>
                        </GroupStyle>
                    </GridView.GroupStyle>
                </GridView>
            </SemanticZoom.ZoomedInView>
        </SemanticZoom>
    </Grid>
</Page>
縮小時の見た目を作ろう
次に縮小したときの見た目、ZoomedOutViewを作っていきます。これはZoomedInViewの定義と対して変わりません。しいて言えばグループの設定をしない点と、ItemTemplate内でCategoryオブジェクトにアクセスするためにGroupプロパティを経由して行うという点です。XAMLを以下に示します。
<Page
    x:Class="SemanticZoomSampleApp.BlankPage"
    xmlns="http://schemas.microsoft.com/winfx/2006/xaml/presentation"
    xmlns:x="http://schemas.microsoft.com/winfx/2006/xaml"
    xmlns:local="using:SemanticZoomSampleApp"
    xmlns:d="http://schemas.microsoft.com/expression/blend/2008"
    xmlns:mc="http://schemas.openxmlformats.org/markup-compatibility/2006"
    mc:Ignorable="d">
    <Page.Resources>
        <CollectionViewSource
            x:Name="collectionViewSource"
            IsSourceGrouped="True"
            ItemsPath="Items" />
    </Page.Resources>
    <Grid Background="{StaticResource ApplicationPageBackgroundBrush}">
        <SemanticZoom>
            <SemanticZoom.ZoomedInView>
                <GridView
                    ItemsSource="{Binding Source={StaticResource collectionViewSource}}">
                    <GridView.ItemTemplate>
                        <DataTemplate>
                            <!-- 個々のアイテムのテンプレート -->
                            <StackPanel Width="250" Height="250">
                                <Rectangle Width="250" Height="200" Fill="Blue" />
                                <TextBlock Text="{Binding Name}" Style="{StaticResource ItemTextStyle}" />
                            </StackPanel>
                        </DataTemplate>
                    </GridView.ItemTemplate>
                    <!-- グループの設定 -->
                    <GridView.GroupStyle>
                        <GroupStyle>
                            <GroupStyle.Panel>
                                <ItemsPanelTemplate>
                                    <!-- グルーピングされた要素の配置に使うパネル -->
                                    <VariableSizedWrapGrid
                                        Orientation="Vertical"
                                        MaximumRowsOrColumns="2"
                                        Margin="0,0,80,0" />
                                </ItemsPanelTemplate>
                            </GroupStyle.Panel>
                            <GroupStyle.HeaderTemplate>
                                <!-- グループのヘッダーのテンプレート -->
                                <DataTemplate>
                                    <TextBlock
                                        Text="{Binding Name}"
                                        Style="{StaticResource SubheaderTextStyle}" />
                                </DataTemplate>
                            </GroupStyle.HeaderTemplate>
                        </GroupStyle>
                    </GridView.GroupStyle>
                </GridView>
            </SemanticZoom.ZoomedInView>
            <SemanticZoom.ZoomedOutView>
                <!-- 縮小時の表示 -->
                <GridView x:Name="zoomedOutView">
                    <GridView.ItemsPanel>
                        <ItemsPanelTemplate>
                            <!-- 横並びで表示 -->
                            <VirtualizingStackPanel Orientation="Horizontal" />
                        </ItemsPanelTemplate>
                    </GridView.ItemsPanel>
                    <GridView.ItemTemplate>
                        <!-- グループの項目の表示を定義 -->
                        <DataTemplate>
                            <StackPanel>
                                <Rectangle Width="250" Height="250" Fill="Red" />
                                <!-- GroupでCategoryオブジェクトにアクセスできる -->
                                <TextBlock Grid.Row="1" Text="{Binding Group.Name}" Style="{StaticResource BasicTextStyle}" />
                            </StackPanel>
                        </DataTemplate>
                    </GridView.ItemTemplate>
                </GridView>
            </SemanticZoom.ZoomedOutView>
        </SemanticZoom>
    </Grid>
</Page>
最後にZoomedOutViewのItemsSourceを設定します。これは、CollectionViewSourceのViewプロパティのCollectionGroupsプロパティを設定します。ということで、コードビハインドは以下のようなコードになります。
using Windows.UI.Xaml.Controls;
using Windows.UI.Xaml.Navigation;

namespace SemanticZoomSampleApp
{
    public sealed partial class BlankPage : Page
    {
        public BlankPage()
        {
            this.InitializeComponent();
        }

        protected override void OnNavigatedTo(NavigationEventArgs e)
        {
            // データの設定
            this.collectionViewSource.Source = Category.CreateCategories();
            this.zoomedOutView.ItemsSource = this.collectionViewSource.View.CollectionGroups;
        }
    }
}
実行してみよう
この状態で実行すると、以下のように横長の画面が表示されます。

そしてCtrl+手前スクロールかタッチの場合はピンチをしてみましょう(といっても私はタッチ対応端末持ってないのでシミュレータで左クリックしながら手前にスクロールしてます・・・)そうするとカテゴリだけが横並びで表示されます。これがZoomedOutViewの表示です。

そして、適当なところ(たとえばカテゴリ10)を選択するとZoomedInViewに表示が切り替わってきちんと画面内にカテゴリ10が表示されます。

まとめ
ということで、今回やったことを簡単にまとめると以下のようになります。
- セマンティックズームを実現するにはSemanticZoomコントロールを使う
- ZoomedInViewに拡大時の表示を定義する
- ZoomedOutViewに縮小時の表示を定義する
- ZoomedInView/ZoomedOutViewに設定できるデフォルトのコントロールはGridViewとListView
- ZoomedInViewのItemsSourceにはCollectionViewSourceを設定
- GroupStyleでグルーピングに関する表示等を設定する
- ZoomedOutViewのItemsSourceにはCollectionViewSourceのViewプロパティのCollectionGroupsプロパティを設定
- ZoomedOutViewのItemTemplateで元のオブジェクトを辿るにはGroupプロパティ経由で行う
といった感じです。もうちょい楽にできないかなぁ。MVVM的にやろうと思ったらCollectionViewSourceのView.CollectionGroupsをBindingできなかったのでちょっと悩ましい感じです。あと、今回作ったアプリの見た目は余白やらなんやらが全然メトロのガイドラインに沿ってないので要注意です!
以上
