これは、XAML Advent Calendar 2013 の7日目の記事です。なんだか、またカレンダーのハードルが高めになってきたのでここで一気に普通に戻します!
最近は、HTML5に注力してたり、XAMLでもWindows ストアアプリに注力してたりで目玉!というような新機能が少ないWPFですが、WPF4.5でも地味な新機能が追加されてたりします。今回はその中で、データの値変更に伴うデータの再配置(ライブ形成)を紹介しようと思います。
新機能の前に
新機能の前にデフォルトの挙動を確認します。DataGridに以下のクラスを表示します。 DataGridなどのItemsControl系のクラスには、CollectionViewを使ったソートやグルーピングの機能がデフォルトで組み込まれています。たとえば、以下ようなクラスがあるとします。
using System.ComponentModel;
using System.Runtime.CompilerServices;

namespace LiveSharpingSample
{
    /// <summary>
    /// お約束のINotifyPropertyChangedを実装したベースクラス
    /// </summary>
    public class BindableBase : INotifyPropertyChanged
    {
        public event PropertyChangedEventHandler PropertyChanged;
        protected virtual void RaisePropertyChanged([CallerMemberName] string propertyName = null)
        {
            var h = this.PropertyChanged;
            if (h != null)
            {
                h(this, new PropertyChangedEventArgs(propertyName));
            }
        }

        protected virtual bool SetProperty<T>(ref T store, T value, [CallerMemberName] string propertyName = null)
        {
            if (Equals(store, value))
            {
                return false;
            }

            store = value;
            this.RaisePropertyChanged(propertyName);
            return true;
        }
    }

    /// <summary>
    /// DataGridに表示するクラス
    /// </summary>
    public class Person : BindableBase
    {
        private int salary;

        public int Salary
        {
            get { return this.salary; }
            set { this.SetProperty(ref this.salary, value); }
        }

        private string name;

        public string Name
        {
            get { return this.name; }
            set { this.SetProperty(ref this.name, value); }
        }

    }
}
このクラスをDataGridに表示してみます。MainPage.xamlを以下のようにさくっと定義します。
<Window x:Class="LiveSharpingSample.MainWindow"
        xmlns="http://schemas.microsoft.com/winfx/2006/xaml/presentation"
        xmlns:x="http://schemas.microsoft.com/winfx/2006/xaml"
        Title="MainWindow" Height="350" Width="525">
    <Grid>
        <Grid.RowDefinitions>
            <RowDefinition Height="Auto" />
            <RowDefinition />
        </Grid.RowDefinitions>
        <StackPanel>
            <Button Content="生成" Click="GenerateButton_Click" />
            <Button Content="シャッフル" Click="ShuffleButton_Click" />
        </StackPanel>
        <DataGrid x:Name="dataGrid" Grid.Row="1" AutoGenerateColumns="False" >
            <DataGrid.Columns>
                <DataGridTextColumn Header="名前" Binding="{Binding Name}" />
                <DataGridTextColumn Header="給料" Binding="{Binding Salary}" />
            </DataGrid.Columns>
        </DataGrid>
    </Grid>
</Window>
MainPage.xaml.csは、以下のようになります。適当なPersonクラスのインスタンスを15件作成してDataGridのItemsSourceプロパティに設定しています。
using System;
using System.Collections.ObjectModel;
using System.ComponentModel;
using System.Linq;
using System.Windows;
using System.Windows.Data;

namespace LiveSharpingSample
{
    /// <summary>
    /// MainWindow.xaml の相互作用ロジック
    /// </summary>
    public partial class MainWindow : Window
    {
        private ObservableCollection<Person> people;

        public MainWindow()
        {
            InitializeComponent();
        }

        private void GenerateButton_Click(object sender, RoutedEventArgs e)
        {
            var r = new Random();
            // 適当なデータを15件作成
            people = new ObservableCollection<Person>(Enumerable
                .Range(1, 15)
                .Select(i => new Person
                {
                    Name = "tanaka" + i,
                    // Salaryは1-500000の間
                    Salary = r.Next(500000)
                }));
            // dataGridに設定
            this.dataGrid.ItemsSource = people;

            // Salaryプロパティでソート
            var view = CollectionViewSource.GetDefaultView(this.people);
            view.SortDescriptions.Add(new SortDescription("Salary", ListSortDirection.Descending));
        }

        private void ShuffleButton_Click(object sender, RoutedEventArgs e)
        {
            // Salaryプロパティの値を適当に設定しなおす
            if (this.people == null)
            {
                return;
            }

            var r = new Random();
            foreach (var p in this.people)
            {
                p.Salary = r.Next(500000);
            }
        }
    }
}
このコードのポイントは、peopleをDataGridに設定したあとにGetDefaultViewメソッドでICollectionViewを取得してSalaryプロパティでソートしている箇所です。こうすることで、WPFの組み込みのソート機能を使うことができます。もう1つポイントとなるのは、ShuffleButton_Clickメソッドです。このコードは、peopleフィールド内のPeopleクラスのインスタンスのSalaryプロパティをランダムに書き換えます。
実行してみよう
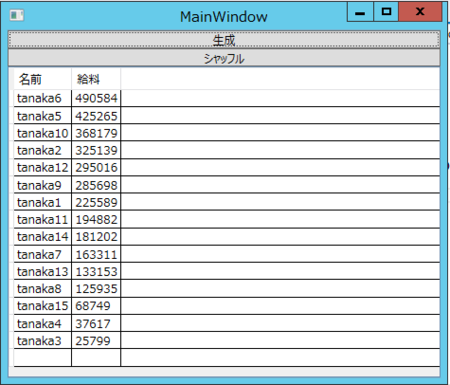
このプログラムを実行して、生成ボタンをクリックすると15件のデータが画面に表示されます。

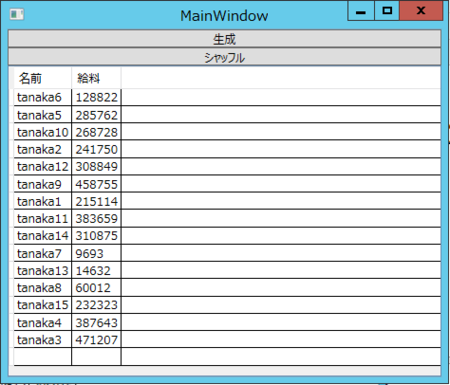
この状態でシャッフルボタンをクリックしてみます。

せっかくソートされていたデータが台無しになってしまいました。これが、デフォルトの動作になります。
プロパティを書き換えた後でソートを再実行する方法
データの書き換えが終わったタイミングでICollectionViewのRefreshメソッドを呼びましょう。
private void ShuffleButton_Click(object sender, RoutedEventArgs e)
{
    // Salaryプロパティの値を適当に設定しなおす
    if (this.people == null)
    {
        return;
    }

    var r = new Random();
    foreach (var p in this.people)
    {
        p.Salary = r.Next(500000);
    }
    // Viewをリフレッシュする
    var view = CollectionViewSource.GetDefaultView(this.people);
    view.Refresh();
}
これで、ソートが再実行されます。
WPF 4.5の新機能のLiveShapingを使った場合
WPF 4.5の新機能のLiveShapingは、グルーピング、フィルタリング、ソートをデータが書き換わった後にリアルタイムで見た目に反映する機能を提供してくれます。LiveSharping機能は、ICollectionViewLiveShapingインターフェースによって提供されます。このインターフェースは、以下のようなプロパティが定義されています。
- CanChangeLive(Filtering|Grouping|Sorting)
- リアルタイムフィルタリング, グルーピング, ソーティングが可能かどうかを返します
- IsLive(Filtering|Grouping|Sorting)
- リアルタイムフィルタリング, グルーピング, ソーティングを有効かどうかを取得または設定します。
- Live(Filtering|Grouping|Sorting)Properties
- リアルタイムフィルタリング, グルーピング, ソーティングを有効にするプロパティ名を指定するコレクションを取得します。
ICollectionViewLiveShapingインターフェースは、ICollectionViewに対してas演算子でキャストすることで取得できます。(正確にはICollectionViewを実装している具象クラスが実装しているかどうかで使えるか使えないか決まります)
例えば、先ほどのSalaryプロパティでリアルタイムソートを行うようにするためには、データ生成箇所のコードにICollectionViewLiveShapingインターフェースを使った以下のようなコードを追加します。
private void GenerateButton_Click(object sender, RoutedEventArgs e)
{
    var r = new Random();
    // 適当なデータを15件作成
    people = new ObservableCollection<Person>(Enumerable
        .Range(1, 15)
        .Select(i => new Person
        {
            Name = "tanaka" + i,
            // Salaryは1-500000の間
            Salary = r.Next(500000)
        }));
    // dataGridに設定
    this.dataGrid.ItemsSource = people;

    // Salaryプロパティでソート
    var view = CollectionViewSource.GetDefaultView(this.people);
    view.SortDescriptions.Add(new SortDescription("Salary", ListSortDirection.Descending));

    // Salaryのソートをリアルタイムソートに設定する
    var liveShaping = view as ICollectionViewLiveShaping;
    if (liveShaping == null)
    {
        // ICollectionViewLiveShapingを実装していない場合は何もしない
        return;
    }

    // リアルタイムソートをサポートしているか確認する
    if (liveShaping.CanChangeLiveSorting)
    {
        // リアルタイムソートをサポートしている場合は対象のプロパティにSalaryを追加して
        // リアルタイムソートを有効にする。
        liveShaping.LiveSortingProperties.Add("Salary");
        liveShaping.IsLiveSorting = true;
    }
}
こうすることで、Salaryプロパティの値の変化に応じてソートが自動的に行われるようになります。
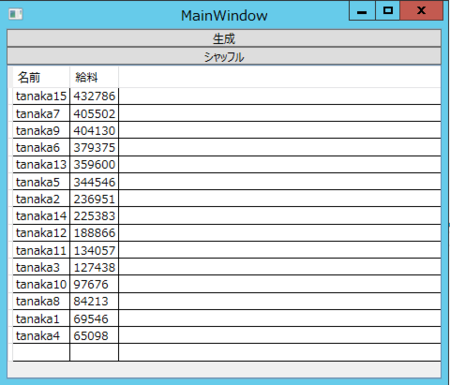
実行して生成ボタンを押した直後の画面

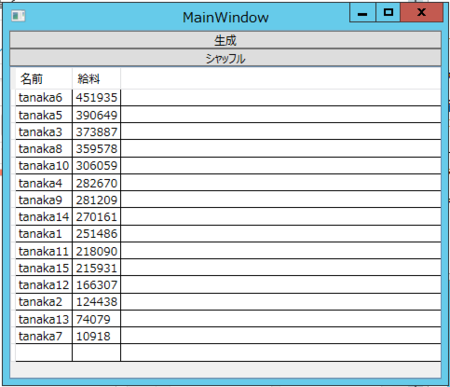
シャッフルボタンをおしたところ、Salaryプロパティでソートが維持されていることが確認できます。

今回は、ソート機能を使いましたが、フィルタリングやグルーピングに対しても同様の手順でリアルタイムに反映するようにすることができます。細かい改善点ですがなかなかいいんじゃないでしょうか。