注意:MEFは、正式リリース前のbeta版を使ってるので、正式版とは違うかもしれません。
次期.NET Framework4に入るDIコンテナのMEFとWPFを組み合わせて、簡単なHello worldを作ってみようと思います。
下準備
まず、最初にWPFアプリケーションを作成します。名前は「MefWpfHelloWorld」にしました。
参照設定で、MEFのアセンブリであるSystem.ComponentModel.Composition.dllを追加します。次に、Window1.xamlの名前が気に入らないので、MainWindow.xamlに名前変更をします。クラス名と、XAML内にあるx:Class属性のクラス名もMainWindowに変更しておきます。
以上で下準備完了です。
Appクラスの変更
では、Appクラスを書き換えてみようと思います。
App.xamlには、StartupUri属性が指定されていると思います。さっき名前を変えたWindow1.xamlが書かれていると思うので、さくっと消してStartupイベントを登録します。
<Application x:Class="MefWpfHelloWorld.App"
    xmlns="http://schemas.microsoft.com/winfx/2006/xaml/presentation"
    xmlns:x="http://schemas.microsoft.com/winfx/2006/xaml"
    Startup="Application_Startup">
    <Application.Resources>

    </Application.Resources>
</Application>
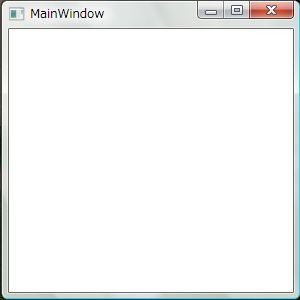
次にApp.xaml.csでMainWindowプロパティをnewで上書きしてMEFのImport属性をつけます。MainWindowという名前でExportされているWindowクラスを受け取るようにしています。そして、Startupイベントハンドラ内で、CompositionContainerを初期化します。初期化後に、自分自身をコンテナに登録して、MainWindowを表示しています。
このMainWindowはMEFで自動的に登録されたものになります。
// App.xaml.cs
using System.ComponentModel.Composition;
using System.ComponentModel.Composition.Hosting;
using System.Diagnostics;
using System.Windows;

namespace MefWpfHelloWorld
{
    public partial class App : Application
    {
        // MainWindowという名前でExportされているものを設定する
        [Import("MainWindow")]
        public new Window MainWindow
        {
            get { return base.MainWindow; }
            set { base.MainWindow = value; }
        }

        private CompositionContainer _container;
        private void Application_Startup(object sender, StartupEventArgs e)
        {
            if (!ComposeContainer() || this.MainWindow == null)
            {
                // 失敗したら終わる
                this.Shutdown();
                return;
            }

            // 後始末処理を追加
            this.Exit += (s, evt) =>
                {
                    if (_container != null)
                    {
                        _container.Dispose();
                    }
                };
            this.MainWindow.Show();
        }

        private bool ComposeContainer()
        {
            try
            {
                // 今のアセンブリと、カレントディレクトリ上の
                // アセンブリをコンテナに読み込ませる
                var agg = new AggregateCatalog(
                    new AssemblyCatalog(typeof(App).Assembly),
                    new DirectoryCatalog("."));
                _container = new CompositionContainer(agg);
                // 自分自身を登録
                _container.ComposeParts(this);
                return true;
            }
            catch (CompositionException ex)
            {
                Debug.WriteLine(ex);
                // とりあえず失敗したらfalseで。
                // 実際はちゃんとエラーログでも吐こう。
                return false;
            }
        }
    }
}
MainWindowクラスの変更
最初に下準備で、名前変更をしたMainWindowクラスにも手をいれます。こいつはMainWindowという名前でWindow型としてExportしてやるだけでOKです。
using System.ComponentModel.Composition;
using System.Windows;

namespace MefWpfHelloWorld
{
    [Export("MainWindow", typeof(Window))]
    public partial class MainWindow : Window
    {
        public MainWindow()
        {
            InitializeComponent();
        }
    }
}
ViewModelの作成
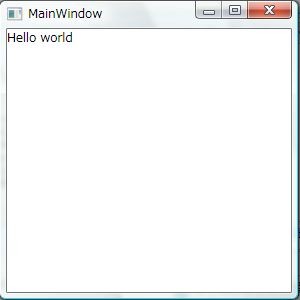
これでは、真っ白なだけなので、ViewModelクラスを作成して、Hello worldを画面に表示してみようと思います。MainWindowViweModelという名前でクラスを作成して、以下のように記述します。Exportしてる以外は、何の変哲もないクラスです。今回は、ViewModelからViewへのデータの変更の反映とかも無いので、INotifyPropertyChangedも実装していません。
using System.ComponentModel.Composition;

namespace MefWpfHelloWorld
{
    [Export]
    public class MainWindowViewModel
    {
        public string Message
        {
            get { return "Hello world"; }
        }
    }
}
ViewとViewModelをくっつける
今回は、MEFを使うと言うことなので、DataTemplateでViewModelとViewを繋ぐのではなく、MEFでViewにViewModelを注入します。
using System.ComponentModel.Composition;
using System.Windows;

namespace MefWpfHelloWorld
{
    [Export("MainWindow", typeof(Window))]
    public partial class MainWindow : Window
    {
        public MainWindow()
        {
            InitializeComponent();
        }

        // DataContextをラップする感じでModelプロパティを定義する
        [Import]
        public MainWindowViewModel Model
        {
            get { return DataContext as MainWindowViewModel; }
            set { DataContext = value; }
        }
    }
}
そして、XAML側では、ViweModelのMessageプロパティをバインドします。
<Window x:Class="MefWpfHelloWorld.MainWindow"
    xmlns="http://schemas.microsoft.com/winfx/2006/xaml/presentation"
    xmlns:x="http://schemas.microsoft.com/winfx/2006/xaml"
    Title="MainWindow" Height="300" Width="300">
    <Grid>
        <TextBlock Text="{Binding Message}" />
    </Grid>
</Window>

