これまでの記事で、とりあえずHello worldは実装すること出来ました。
今回は、ちょっと踏み込んで検索系の処理をちゃんと作ってみようと思います。
プロジェクトの作成 & 下準備
CrudRIAServicesという名前でSilverlight Applicationを作成します。もちろん.NET RIA Servicesは有効にしておきます。
そして、参照にSystem.ComponentModel.DataAnnotationsを追加しておきます。
恐らくSystem.ComponentModel.DataAnnotationsは二種類あると思います。version 99.0.0.0という怪しいバージョン番号のほうを追加しましょう。
これを追加しないと、コンパイルが通りません。
そして、WebのプロジェクトにEmployeesDataStoreという名前のクラスを作成します。DBまで用意するのは、ちょっと大変なので、擬似DBみたいな感じでお茶を濁します。ここら辺は、RIA Servicesとはあまり関係ないので、さくっとコードを載せます。
using System;
using System.Collections.Generic;
using System.ComponentModel.DataAnnotations;
using System.Linq;

namespace CrudRIAServices.Web
{
    public static class EmployeesDataStore
    {
        // ロック用
        private static readonly object _syncObject = new object();

        private static List<Employee> _employees;
        static EmployeesDataStore()
        {
            // 適当な従業員データを1000件作成
            var r = new Random();
            _employees = Enumerable.Range(0, 1000).Select(i =>
                new Employee
                {
                    ID = i,
                    Name = "田中 太郎" + i,
                    EntDate = new DateTime(1950 + r.Next(50), 4, 1),
                    Salary = 200000 + r.Next(10) * 10000
                }).ToList();
        }

        /// <summary>
        /// 前件データ取得(ID順)
        /// </summary>
        /// <returns></returns>
        public static IQueryable<Employee> GetEmployees()
        {
            lock (_syncObject)
            {
                return _employees.OrderBy(current => current.ID).AsQueryable();
            }
        }

        /// <summary>
        /// 更新(更新対象が無い場合はInvalidOperationException)
        /// </summary>
        /// <param name="employee"></param>
        public static void Update(Employee employee)
        {
            lock (_syncObject)
            {
                // IDが同じものを探す。(無い場合はInvalidOperationExceptionかな)
                var target = _employees.Where(current => current.ID == employee.ID).Single();
                // データの上書き
                target.Name = employee.Name;
                target.EntDate = employee.EntDate;
                target.Salary = employee.Salary;
            }
        }

        /// <summary>
        /// 追加(重複登録はInvalidOperationException)
        /// </summary>
        /// <param name="employee"></param>
        public static void Insert(Employee employee)
        {
            lock (_syncObject)
            {
                if (_employees.Any(current => current.ID == employee.ID))
                {
                    throw new InvalidOperationException("insert failed : " + employee.ID);
                }
                _employees.Add(employee);
            }
        }

        /// <summary>
        /// ID指定で削除(IDで指定したEmployeeが無い場合はInvalidOperationException)
        /// </summary>
        /// <param name="id"></param>
        public static void Delete(int id)
        {
            lock (_syncObject)
            {
                var target = _employees.Where(current => current.ID == id).Single();
                _employees.Remove(target);
            }
        }
    }

    /// <summary>
    /// 従業員
    /// </summary>
    public class Employee
    {
        /// <summary>
        /// 識別ID
        /// </summary>
        [Key]
        public int ID { get; set; }

        /// <summary>
        /// 名前
        /// </summary>
        public string Name { get; set; }

        /// <summary>
        /// 入社年月日
        /// </summary>
        public DateTime EntDate { get; set; }

        /// <summary>
        /// 給料
        /// </summary>
        public int Salary { get; set; }
    }
}
一応おまけ程度に、同時実行に対応した感じのものにしてみました。件数が多くなると、恐ろしく遅くなりそうですが・・・。とりあえず、これをDBと見立ててDomainServiceを作成していきます。
Domain Service Classの作成
新規作成からDomain Service Classを追加します。名前は「EmployeesDomainService」にしました。
検索用に、IQueryable
using System.Linq;
using System.Web.DomainServices;
using System.Web.Ria;

namespace CrudRIAServices.Web
{
    [EnableClientAccess()]
    public class EmployeesDomainService : DomainService
    {
        public IQueryable<Employee> GetEmployees()
        {
            return EmployeesDataStore.GetEmployees();
        }
    }
}
これで完了です。次にクライアント側の処理にうつっていきます。
クライアント(Silverlight)側の実装
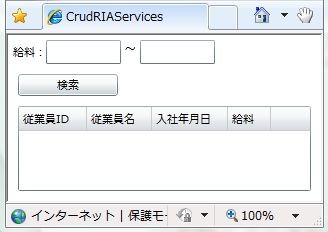
まず、画面から作っていきます。一応全件表示だけではなくて、以下の条件で検索できるように作っていこうと思います。
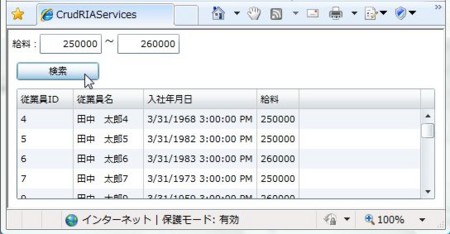
- 給料の上限と下限が入力できて、その間に収まる給料の人を表示する
- 下限のみ入力された場合は、その給料以上の人のみ表示する
- 上限のみ入力された場合は、その給料以下の人のみ表示する
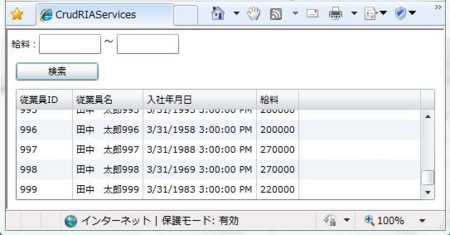
- 上限も下限も省略された場合は、全件表示する
XAMLでさくっと画面を組み立てます。
<UserControl x:Class="CrudRIAServices.MainPage"
    xmlns:dataInput="clr-namespace:System.Windows.Controls;assembly=System.Windows.Controls.Data.Input"
    xmlns:data="clr-namespace:System.Windows.Controls;assembly=System.Windows.Controls.Data"
    xmlns="http://schemas.microsoft.com/winfx/2006/xaml/presentation"
    xmlns:x="http://schemas.microsoft.com/winfx/2006/xaml"
    xmlns:d="http://schemas.microsoft.com/expression/blend/2008"
    xmlns:mc="http://schemas.openxmlformats.org/markup-compatibility/2006"
    mc:Ignorable="d" d:DesignWidth="640" d:DesignHeight="480">
    <UserControl.Resources>
        <!-- 給料入力用テキストボックスのスタイル -->
        <Style x:Key="textBoxSalaryStyle" TargetType="TextBox">
            <Setter Property="TextAlignment" Value="Right" />
            <Setter Property="Width" Value="75" />
            <Setter Property="InputMethod.IsInputMethodEnabled" Value="False" />
        </Style>
        <!-- 検索ボタンのスタイル -->
        <Style x:Key="commandButtonStyle" TargetType="Button">
            <Setter Property="Width" Value="100" />
            <Setter Property="Margin" Value="0,0,5,0" />
        </Style>
    </UserControl.Resources>
    <Grid x:Name="LayoutRoot" Margin="5">
        <Grid.RowDefinitions>
            <!-- 検索条件入力部 -->
            <RowDefinition Height="Auto" />
            <!-- 余白 -->
            <RowDefinition Height="5" />
            <!-- 検索ボタンを置く -->
            <RowDefinition Height="Auto" />
            <!-- グリッド -->
            <RowDefinition />
        </Grid.RowDefinitions>

        <!-- 検索条件入力部 -->
        <Grid Grid.Row="0">
            <StackPanel Orientation="Horizontal">
                <dataInput:Label Content="給料:" />
                <TextBox x:Name="textBoxUnderSalary"
                    Style="{StaticResource textBoxSalaryStyle}"/>
                <TextBlock Text=" 〜 " />
                <TextBox x:Name="textBoxUpperSalary"
                    Style="{StaticResource textBoxSalaryStyle}"/>
            </StackPanel>
        </Grid>

        <!-- 検索ボタンを置く -->
        <Grid Grid.Row="2" Margin="5">
            <StackPanel Orientation="Horizontal">
                <Button Content="検索" Click="SearchButton_Click"
                    Style="{StaticResource commandButtonStyle}"/>
            </StackPanel>
        </Grid>

        <!-- グリッドを置く -->
        <Grid Grid.Row="3" Margin="5">
            <!-- とりあえず読み取り専用 -->
            <data:DataGrid x:Name="dataGrid"
                AutoGenerateColumns="False" IsReadOnly="True">
                <data:DataGrid.Columns>
                    <data:DataGridTextColumn
                        Header="従業員ID"
                        Binding="{Binding ID}" />
                    <data:DataGridTextColumn
                        Header="従業員名"
                        Binding="{Binding Name}" />
                    <data:DataGridTextColumn
                        Header="入社年月日"
                        Binding="{Binding EntDate}" />
                    <data:DataGridTextColumn
                        Header="給料"
                        Binding="{Binding Salary}" />
                </data:DataGrid.Columns>
            </data:DataGrid>
        </Grid>
    </Grid>
</UserControl>
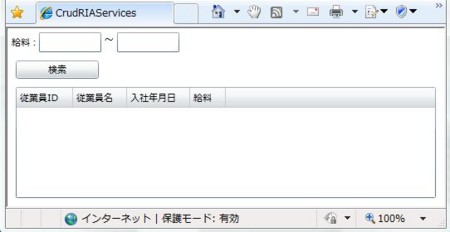
コードビハインドには、検索ボタンのクリックイベントハンドラを追加します。実行すると以下のような画面になります。
次にコードビハインドを作っていきます。Hello worldと違って、今回は画面からの入力に応じて、検索条件が変わっていきます。これは、GetEmployeesQueryメソッドの戻り値であるEntityQuery
ここまでやったら、あとは愚直にコードを書いていくだけです。
// コードビハインドのフィールドに、DomainContextを持たせます
private EmployeesDomainContext _context = new EmployeesDomainContext();

// 検索ボタンクリック
private void SearchButton_Click(object sender, RoutedEventArgs e)
{
    int? underSalary;
    int? upperSalary;
    // 入力値に不備があればメッセージボックスを出して終了
    if (!TryParseUpperAndUnderSalary(
            textBoxUnderSalary.Text,
            textBoxUpperSalary.Text,
            out underSalary,
            out upperSalary))
    {
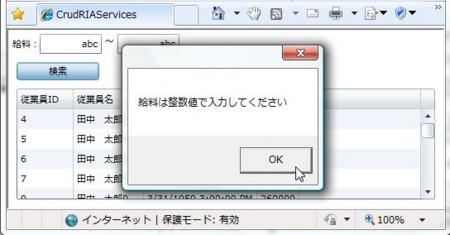
        MessageBox.Show("給料は整数値で入力してください");
        return;
    }

    // 検索(EntityQuery<T>にLinq形式でアクセスするにはusing System.Windows.Ria.Dataが必要)
    var query = _context.GetEmployeesQuery();
    if (underSalary != null)
    {
        query = query.Where(emp => emp.Salary >= underSalary.Value);
    }
    if (upperSalary != null)
    {
        query = query.Where(emp => emp.Salary <= upperSalary.Value);
    }

    // 読み込み中は何も出来なくする
    this.IsEnabled = false;
    // dataGridと従業員データを紐付け
    dataGrid.ItemsSource = _context.Employees;
    // 再検索時用に、一度データをクリアする。
    _context.Employees.Clear();
    _context.Load(query,
        (result) =>
        {
            // 読み込み完了したら、操作可能な状態に戻す
            this.IsEnabled = true;
        }, null);
}

/// <summary>
/// 給料の下限と上限の入力をパースする。
/// どちらかに数字以外の文字が入っていたらNG。
/// 両方に、未入力または数値で入力されている場合はOK。
/// </summary>
/// <param name="inputUnder">給料の下限</param>
/// <param name="inputUpper">給料の上限</param>
/// <param name="outputUnder">給料の下限のパース結果</param>
/// <param name="outputUpper">給料の上限のパース結果</param>
/// <returns>OKの場合true, NGの場合false</returns>
private bool TryParseUpperAndUnderSalary(string inputUnder, string inputUpper,
    out int? outputUnder, out int? outputUpper)
{
    if (!TryParseSalaryInput(inputUnder, out outputUnder))
    {
        outputUpper = null;
        return false;
    }
    if (!TryParseSalaryInput(inputUpper, out outputUpper))
    {
        return false;
    }
    return true;
}

private bool TryParseSalaryInput(string input, out int? output)
{
    // 空文字は未入力でOK
    if (string.IsNullOrEmpty(input))
    {
        output = null;
        return true;
    }

    // 数値の入力はもちろんOK
    int temp = 0;
    if (int.TryParse(input, out temp))
    {
        output = temp;
        return true;
    }

    // 数値以外の入力はNG
    output = null;
    return false;
}
以上、検索系の処理を作ってみた感じです。楽チンだけど、ASP.NET DataServiceとかとここら辺までは使った感じ変わらないかな?
更新系まで作っていくと、変わってくると思います。
