UWP Community Toolkitが、ちょっと目をはなしてる隙に1.4.1にまでバージョンアップしてました。 色々なコントロールとかが提供されているのですが、ListViewに絡むコントロールをいくつか紹介したいと思います。
インクリメンタルローディング
最近のアプリって下の方までスクロールすると続きを読み込むっていうUI多いですよね? ということで、そういう機能を実現する方法がUWPに提供されています。
ISupportIncrementlLoadingインターフェースがそれになります。
ただ、こいつの実装だるいんですよね。 ということで、UWP Community Toolkitでは、いい感じに扱ってくれる機能を提供していたりします。
ということでさっそく作ってみましょう。
まず、何でもいいので表示用のデータの入れ物クラスを準備します。
public class Person
{
    public string Name { get; set; }

    public override string ToString() => this.Name;
}
このクラスのデータをインクリメンタルローディングしてみようと思います。UWP Community ToolkitにはIIncrementalSource<T>というインターフェースがあります。こいつを実装することでインクリメンタルローディングが出来るようになります。
インターフェースは単純でページ数とデータ取得件数が渡ってくるので、それの部分に対応したデータを返すだけです。
ということで、NuGetでUWP Community Toolkitで検索してパッケージを追加しましょう。Microsoft.Toolkit.Uwp.UI.Controlsが今回のお目当てのパッケージになります。
IIncrementalSource<T>インターフェースの実装は以下のような感じになります。
public class PersonSource : IIncrementalSource<Person>
{
    public Task<IEnumerable<Person>> GetPagedItemsAsync(
        int pageIndex,
        int pageSize,
        CancellationToken cancellationToken = default(CancellationToken))
    {
        Debug.WriteLine($"GetPagedItemsAsync: {pageIndex}, {pageSize}");
        var results = Enumerable.Range(pageIndex * pageSize, pageSize)
            .Select(x => new Person { Name = $"tanaka {x}" });
        return Task.FromResult(results);
    }
}
今回は、ログを吐いて適当にデータを生成して返しています。本当は、ここでREST APIとか叩いてデータを取ってくる感じになります。
IIncremantlSource<T>を実装したら、それを扱うためのIncrementalLoadingCollection<TSource, T>クラスを作ります。今回はMainPageにプロパティとして持たせました。
public sealed partial class MainPage : Page
{
    public IncrementalLoadingCollection<PersonSource, Person> People { get; } = new IncrementalLoadingCollection<PersonSource, Person>();

    public MainPage()
    {
        this.InitializeComponent();
    }
}
あとは、適当にXAMLでこれをバインドします。
<Page x:Class="App13.MainPage"
      xmlns="http://schemas.microsoft.com/winfx/2006/xaml/presentation"
      xmlns:x="http://schemas.microsoft.com/winfx/2006/xaml"
      xmlns:local="using:App13"
      xmlns:d="http://schemas.microsoft.com/expression/blend/2008"
      xmlns:mc="http://schemas.openxmlformats.org/markup-compatibility/2006"
      mc:Ignorable="d">

    <Grid Background="{ThemeResource ApplicationPageBackgroundThemeBrush}">
        <ListView ItemsSource="{x:Bind People}">
        </ListView>
    </Grid>
</Page>
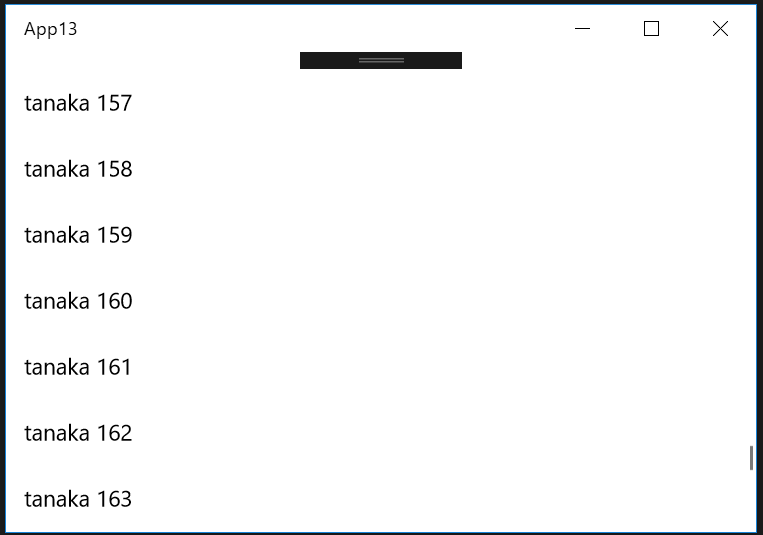
実行すると、以下のような結果になります。(といっても普通にデータが表示されるだけです)下までスクロールすると延々とデータが表示されるのがわかります。

ひっぱって更新(PullToRefresh)
UWPのListViewに何故標準でないのか?という引っ張って更新機能ですが、UWP Community ToolkitにはPullToRefreshListViewというコントロールがあります。ListViewのかわりに使うことで、引っ張って更新が簡単に実現できます。
PullToRefreshContentプロパティで、引っ張ったときに表示されるメッセージやコンテンツを編集できます。ReleaseToRefreshContentプロパティで更新されるところまで引っ張ったときに表示されるメッセージやコンテンツを編集できます。
そして、RefreshRequestedイベントかRefreshCommandを処理することで引っ張って更新時の処理を実行できます。コード例は以下のような感じになります。
<Page x:Class="App13.MainPage"
      xmlns="http://schemas.microsoft.com/winfx/2006/xaml/presentation"
      xmlns:x="http://schemas.microsoft.com/winfx/2006/xaml"
      xmlns:local="using:App13"
      xmlns:d="http://schemas.microsoft.com/expression/blend/2008"
      xmlns:mc="http://schemas.openxmlformats.org/markup-compatibility/2006"
      xmlns:controls="using:Microsoft.Toolkit.Uwp.UI.Controls"
      mc:Ignorable="d">

    <Grid Background="{ThemeResource ApplicationPageBackgroundThemeBrush}">
        <controls:PullToRefreshListView ItemsSource="{x:Bind People}"
                                        PullToRefreshContent="引っ張って更新"
                                        ReleaseToRefreshContent="離すと更新します"
                                        RefreshRequested="PullToRefreshListView_RefreshRequested">
        </controls:PullToRefreshListView>
    </Grid>
</Page>
イベントハンドラでは、今回の例ではIncrementalLoadingCollection<TSource, T>のRefreshAsyncメソッドをたたいています。
public sealed partial class MainPage : Page
{
    public IncrementalLoadingCollection<PersonSource, Person> People { get; } = new IncrementalLoadingCollection<PersonSource, Person>();

    public MainPage()
    {
        this.InitializeComponent();
    }

    private async void PullToRefreshListView_RefreshRequested(object sender, EventArgs e)
    {
        await this.People.RefreshAsync();
    }
}
実行すると以下のような感じで引っ張って更新が出来るようになります。


左右にスワイプ可能なListView
最近よくあるUIでListViewの項目を左右にスワイプすることでアクションを実行するというものがあります。これもUWP Community Toolkitで提供されています。
SlidableListItemをListViewのItemTemplateに設定することで実現可能です。注意点としては、SlidableListItemをListViewItemいっぱいに表示するためにHorizontalContentAlignmentとVertlcalContentAlignmentをStretchに設定しておくという点があります。
<Page x:Class="App13.MainPage"
      xmlns="http://schemas.microsoft.com/winfx/2006/xaml/presentation"
      xmlns:x="http://schemas.microsoft.com/winfx/2006/xaml"
      xmlns:local="using:App13"
      xmlns:d="http://schemas.microsoft.com/expression/blend/2008"
      xmlns:mc="http://schemas.openxmlformats.org/markup-compatibility/2006"
      xmlns:controls="using:Microsoft.Toolkit.Uwp.UI.Controls"
      mc:Ignorable="d">

    <Grid Background="{ThemeResource ApplicationPageBackgroundThemeBrush}">
        <controls:PullToRefreshListView ItemsSource="{x:Bind People}"
                                        PullToRefreshContent="引っ張って更新"
                                        ReleaseToRefreshContent="離すと更新します"
                                        RefreshRequested="PullToRefreshListView_RefreshRequested"
                                        SelectionMode="None">
            <ListView.ItemTemplate>
                <DataTemplate x:DataType="local:Person">
                    <controls:SlidableListItem>
                        <TextBlock Text="{x:Bind Name}" />
                    </controls:SlidableListItem>
                </DataTemplate>
            </ListView.ItemTemplate>
            <ListView.ItemContainerStyle>
                <Style TargetType="ListViewItem">
                    <Setter Property="HorizontalContentAlignment"
                            Value="Stretch" />
                    <Setter Property="VerticalContentAlignment"
                            Value="Stretch" />
                </Style>
            </ListView.ItemContainerStyle>
        </controls:PullToRefreshListView>
    </Grid>
</Page>
これで実行すると以下のように左右にスワイプするとアイコンが表示されるようになります。

アイコンのカスタマイズは、LeftIconプロパティとRightIconプロパティで行います。
<controls:SlidableListItem LeftIcon="Accept"
                           RightIcon="AddFriend">
    <TextBlock Text="{x:Bind Name}" />
</controls:SlidableListItem>
左右にスワイプされたときの処理はLeft/RightCommandRequestedイベントかLeft/RightCommandを処理することで出来ます。Left/RightCommandParameterを活用することでスワイプされた項目のデータを渡したりもできます。
ICommandインターフェースの実装がだるいのでPrism.CoreをNuGetから参照に追加して以下のようなコードを書きます。
public sealed partial class MainPage : Page
{
    public IncrementalLoadingCollection<PersonSource, Person> People { get; } = new IncrementalLoadingCollection<PersonSource, Person>();

    public DelegateCommand<Person> LeftCommand { get; }

    public DelegateCommand<Person> RightCommand { get; }

    public MainPage()
    {
        this.InitializeComponent();
        this.LeftCommand = new DelegateCommand<Person>(x => Debug.WriteLine($"LeftCommand: {x}"));
        this.RightCommand = new DelegateCommand<Person>(x => Debug.WriteLine($"RightCommand: {x}"));
    }

    private async void PullToRefreshListView_RefreshRequested(object sender, EventArgs e)
    {
        await this.People.RefreshAsync();
    }
}
XAMLは以下のような感じになります。
<Page x:Class="App13.MainPage"
      xmlns="http://schemas.microsoft.com/winfx/2006/xaml/presentation"
      xmlns:x="http://schemas.microsoft.com/winfx/2006/xaml"
      xmlns:local="using:App13"
      xmlns:d="http://schemas.microsoft.com/expression/blend/2008"
      xmlns:mc="http://schemas.openxmlformats.org/markup-compatibility/2006"
      xmlns:controls="using:Microsoft.Toolkit.Uwp.UI.Controls"
      mc:Ignorable="d"
      x:Name="page">

    <Grid Background="{ThemeResource ApplicationPageBackgroundThemeBrush}">
        <controls:PullToRefreshListView ItemsSource="{x:Bind People}"
                                        PullToRefreshContent="引っ張って更新"
                                        ReleaseToRefreshContent="離すと更新します"
                                        RefreshRequested="PullToRefreshListView_RefreshRequested"
                                        SelectionMode="None">
            <ListView.ItemTemplate>
                <DataTemplate x:DataType="local:Person">
                    <controls:SlidableListItem LeftIcon="Accept"
                                               RightIcon="AddFriend"
                                               LeftCommand="{Binding LeftCommand, ElementName=page}"
                                               LeftCommandParameter="{Binding}"
                                               RightCommand="{Binding RightCommand, ElementName=page}"
                                               RightCommandParameter="{Binding}">
                        <TextBlock Text="{x:Bind Name}" />
                    </controls:SlidableListItem>
                </DataTemplate>
            </ListView.ItemTemplate>
            <ListView.ItemContainerStyle>
                <Style TargetType="ListViewItem">
                    <Setter Property="HorizontalContentAlignment"
                            Value="Stretch" />
                    <Setter Property="VerticalContentAlignment"
                            Value="Stretch" />
                </Style>
            </ListView.ItemContainerStyle>
        </controls:PullToRefreshListView>
    </Grid>
</Page>
実行すると以下のように、左右にスワイプしたらログが出るようになります。

逆方向にスクロールするとすぐ表示されるヘッダー
これ名前なんて言うんですかね。Facebookアプリとか使ってるとコンテンツを見るために下にスクロールするとヘッダー(ボタンとか操作項目が並んでる)が非表示になって、コンテンツが画面いっぱいに表示されるけど、ちょっと逆方向にスクロールすると、すぐにヘッダーが表示されるっていうやつです。
これは、ScrollHeaderコントロールをListViewのHeaderに設定することで実現できます。このとき、ScrollHeaderコントロールのModeプロパティをQuickReturnにしてホストするListViewコントロールをTargetListViewBaseに設定するのがポイントです。
<Page x:Class="App13.MainPage"
      xmlns="http://schemas.microsoft.com/winfx/2006/xaml/presentation"
      xmlns:x="http://schemas.microsoft.com/winfx/2006/xaml"
      xmlns:local="using:App13"
      xmlns:d="http://schemas.microsoft.com/expression/blend/2008"
      xmlns:mc="http://schemas.openxmlformats.org/markup-compatibility/2006"
      xmlns:controls="using:Microsoft.Toolkit.Uwp.UI.Controls"
      mc:Ignorable="d"
      x:Name="page">

    <Grid Background="{ThemeResource ApplicationPageBackgroundThemeBrush}">
        <controls:PullToRefreshListView x:Name="listView"
                                        ItemsSource="{x:Bind People}"
                                        PullToRefreshContent="引っ張って更新"
                                        ReleaseToRefreshContent="離すと更新します"
                                        RefreshRequested="PullToRefreshListView_RefreshRequested"
                                        SelectionMode="None">
            <ListView.Header>
                <controls:ScrollHeader Mode="QuickReturn"
                                       TargetListViewBase="{x:Bind listView}">
                    <Border Background="Beige">
                        <StackPanel Padding="10"
                                    Orientation="Horizontal">
                            <Button Content="Foo"
                                    Margin="5" />
                            <Button Content="Bar"
                                    Margin="5" />
                            <Button Content="Baz"
                                    Margin="5" />
                        </StackPanel>
                    </Border>
                </controls:ScrollHeader>
            </ListView.Header>
            <ListView.ItemTemplate>
                <DataTemplate x:DataType="local:Person">
                    <controls:SlidableListItem LeftIcon="Accept"
                                               RightIcon="AddFriend"
                                               LeftCommand="{Binding LeftCommand, ElementName=page}"
                                               LeftCommandParameter="{Binding}"
                                               RightCommand="{Binding RightCommand, ElementName=page}"
                                               RightCommandParameter="{Binding}">
                        <TextBlock Text="{x:Bind Name}" />
                    </controls:SlidableListItem>
                </DataTemplate>
            </ListView.ItemTemplate>
            <ListView.ItemContainerStyle>
                <Style TargetType="ListViewItem">
                    <Setter Property="HorizontalContentAlignment"
                            Value="Stretch" />
                    <Setter Property="VerticalContentAlignment"
                            Value="Stretch" />
                </Style>
            </ListView.ItemContainerStyle>
        </controls:PullToRefreshListView>
    </Grid>
</Page>
実行すると、以下のようにヘッダーが表示されて、スクロールすると消えるけど、逆方向にスクロールすると、すぐにょきっと生えてくるようになります。


まとめ
ということで、UWP Community ToolkitでListViewまわりの機能を紹介しました。これ以外にも色々なコントロールや機能があるので、興味のある方は見てみるといいかも?より良いUIが簡単に手に入るかもしれませんしね!