過去記事
- Azure Mobile AppsでUWPを作ってみよう - かずきのBlog@hatena
- Azure Mobile AppsでUWPを作ってみよう「手組編」 - かずきのBlog@hatena
- Azure Mobile AppsでUWPを作ってみよう「同期編」 - かずきのBlog@hatena
- Azure Mobile AppsでUWPを作ってみよう「プッシュ通知編」 - かずきのBlog@hatena
- Azure Mobile AppsをXamarin.Formsからも使ってみよう - かずきのBlog@hatena
あらすじ
普通にXamarin.Formsから使うのは簡単だったので、認証をつけてみようと思います。
サーバーサイドの設定
まず、アプリにTwitter認証をつけていこうと思います。
コールバックURLとウェブサイトにhttps://customokazukitodoapp.azurewebsites.net/.auth/login/twitter/callbackを設定したTwitterアプリをTwitterの開発者サイトで登録します。
Authentication / Authorizationで認証を有効にしてTwitterを選んで、必要な情報を入力します。
詳細は、過去記事を見てみてください。
そして、テーブルに対するアクセスを追加します。手組でやったのでEasy Table使えないのでコードで書きます。以下のようにaccessプロパティに対してauthenticatedを設定します。
import * as azureMobileApps from 'azure-mobile-apps';

let table = azureMobileApps.table();

// 動的生成しない
table.dynamicSchema = false;
// テーブルの定義
table.columns = {
    text: "string",
    complete: "boolean"
};

// 認証が必要
(<any>table).access = 'authenticated';
(<any>table.read).access = 'authenticated';
(<any>table.insert).access = 'authenticated';
(<any>table.update).access = 'authenticated';
(<any>table.delete).access = 'authenticated';
(<any>table.undelete).access = 'authenticated';

table.insert(context => {
    return context.execute()
        .then(r => {
            // Pushが構成されてたら
            if (context.push) {
                // messageParam(任意の名前でOK)に追加されたデータのテキストを突っ込んでプッシュ通知
                context.push.send(null, { messageParam: context.item.text }, error => {})
            }
            return r;
        });
});

module.exports = table;
型定義ファイルにaccessプロパティが定義されてないのでanyにキャストしてお茶を濁しています。プルリクを送ったので、そのうち取り込まれるといいなぁ。
サーバーにpushして変更を反映しておきます。
クライアントサイド
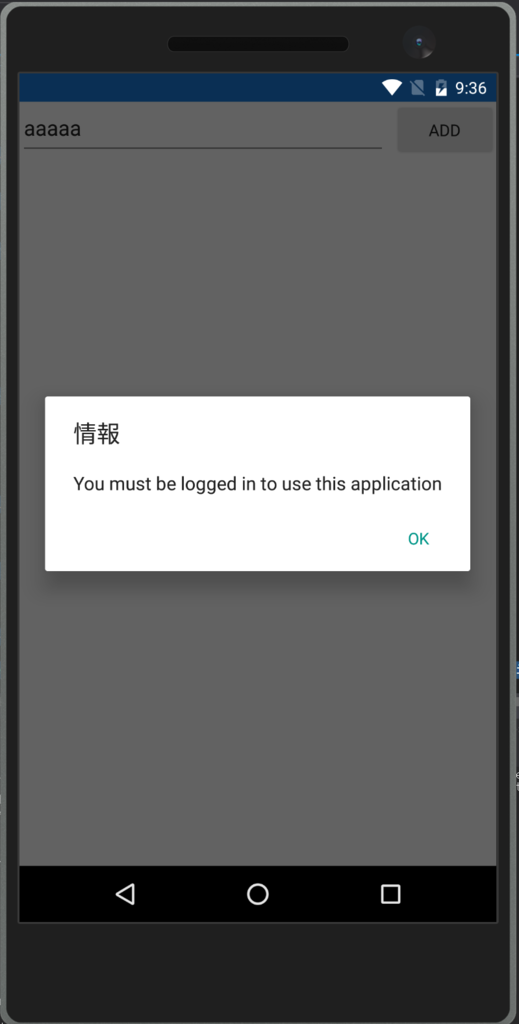
現状ではクライアントサイドは認証がないので例外で落ちてしまいます。例外処理を追加して落ちないようにしておきます。
using Microsoft.WindowsAzure.MobileServices;
using Prism.Commands;
using Prism.Mvvm;
using Prism.Navigation;
using Prism.Services;
using PrismUnityApp28.Models;
using System;
using System.Collections.ObjectModel;

namespace PrismUnityApp28.ViewModels
{
    public class MainPageViewModel : BindableBase, INavigationAware
    {
        private MobileServiceClient Client { get; }

        private IPageDialogService Dialog { get; }

        private ObservableCollection<TodoItem> todoItems;

        public ObservableCollection<TodoItem> TodoItems
        {
            get { return this.todoItems; }
            set { this.SetProperty(ref this.todoItems, value); }
        }

        private string input;

        public string Input
        {
            get { return this.input; }
            set { this.SetProperty(ref this.input, value); }
        }

        public DelegateCommand AddCommand { get; }

        public MainPageViewModel(MobileServiceClient client, IPageDialogService dialog)
        {
            this.Client = client;
            this.Dialog = dialog;
            this.AddCommand = new DelegateCommand(async () =>
            {
                try
                {
                    await this.Client.GetTable<TodoItem>().InsertAsync(new TodoItem { Text = this.Input });
                    this.Input = "";
                    this.TodoItems = new ObservableCollection<TodoItem>(await this.Client.GetTable<TodoItem>().CreateQuery().ToListAsync());
                }
                catch (Exception ex)
                {
                    await this.Dialog.DisplayAlertAsync("情報", ex.Message, "OK");
                }
            });
        }

        public void OnNavigatedFrom(NavigationParameters parameters)
        {
        }

        public async void OnNavigatedTo(NavigationParameters parameters)
        {
            try
            {
                this.TodoItems = new ObservableCollection<TodoItem>(await this.Client.GetTable<TodoItem>().CreateQuery().ToListAsync());
            }
            catch (Exception ex)
            {
                await this.Dialog.DisplayAlertAsync("情報", ex.Message, "OK");
            }
        }
    }
}
こんな感じになります。

認証の作りこみ
認証処理はOS固有の実装が必要になります。そのため、以下のようにインターフェースをPCLに定義して、OS固有実装はOSごとのプロジェクトに任せるようにします。
using System.Threading.Tasks;

namespace PrismUnityApp28.Models
{
    public interface IAuthenticator
    {
        Task LoginAsync();
    }
}
これの実装クラスをDroidプロジェクトにつくります。
using Microsoft.WindowsAzure.MobileServices;
using Prism.Services;
using PrismUnityApp28.Models;
using System;
using System.Threading.Tasks;
using Xamarin.Forms;

namespace PrismUnityApp28.Droid.Models
{
    public class DroidAuthenticator : IAuthenticator
    {
        private MobileServiceClient Client { get; }
        private IPageDialogService Dialog { get; }

        public DroidAuthenticator(MobileServiceClient client, IPageDialogService dialog)
        {
            this.Client = client;
            this.Dialog = dialog;
        }

        public async Task LoginAsync()
        {
            try
            {
                var user = await this.Client.LoginAsync(Forms.Context, MobileServiceAuthenticationProvider.Twitter);
                if (user == null)
                {
                    await this.Dialog.DisplayAlertAsync("情報", "ログインに失敗しました", "OK");
                }
            }
            catch (Exception ex)
            {
                await this.Dialog.DisplayAlertAsync("情報", "ログインに失敗しました", "OK");
            }
        }
    }
}
そして、このクラスをPlatformInitializerで登録するようにします。MainActivity.csにPlatformInitializerの実装があるので、そこに追記します。
public class AndroidInitializer : IPlatformInitializer
{
    public void RegisterTypes(IUnityContainer container)
    {
        container.RegisterType<IAuthenticator, DroidAuthenticator>(new ContainerControlledLifetimeManager());
    }
}
MainPageViewModelクラスに以下のように追記します。
public DelegateCommand LoginCommand { get; }

public MainPageViewModel(MobileServiceClient client, IPageDialogService dialog, IAuthenticator authenticator)
{
    this.Client = client;
    this.Dialog = dialog;
    this.AddCommand = new DelegateCommand(async () =>
    {
        try
        {
            await this.Client.GetTable<TodoItem>().InsertAsync(new TodoItem { Text = this.Input });
            this.Input = "";
            this.TodoItems = new ObservableCollection<TodoItem>(await this.Client.GetTable<TodoItem>().CreateQuery().ToListAsync());
        }
        catch (Exception ex)
        {
            await this.Dialog.DisplayAlertAsync("情報", ex.Message, "OK");
        }
    });

    this.LoginCommand = new DelegateCommand(async () =>
    {
        await authenticator.LoginAsync();
    });
}
ログインのコマンドを追加して、そこでIAuthenticatorのLoginAsyncを呼んでいます。 XAMLにもログインボタンを追加します。
<?xml version="1.0" encoding="utf-8" ?>
<ContentPage xmlns="http://xamarin.com/schemas/2014/forms"
             xmlns:x="http://schemas.microsoft.com/winfx/2009/xaml"
             xmlns:prism="clr-namespace:Prism.Mvvm;assembly=Prism.Forms"
             prism:ViewModelLocator.AutowireViewModel="True"
             x:Class="PrismUnityApp28.Views.MainPage"
             Title="MainPage">
  <Grid>
    <Grid.RowDefinitions>
      <RowDefinition Height="Auto" />
      <RowDefinition />
    </Grid.RowDefinitions>
    <StackLayout Orientation="Horizontal">
      <Entry HorizontalOptions="FillAndExpand"
             Text="{Binding Input, Mode=TwoWay}"/>
      <Button Text="Add"
              Command="{Binding AddCommand}"/>
      <!-- こいつを追加 -->
      <Button Text="Login"
              Command="{Binding LoginCommand}"/>
    </StackLayout>
    <ListView Grid.Row="1"
              ItemsSource="{Binding TodoItems}" />
  </Grid>
</ContentPage>
注意点として、アプリのURLをhttpsとして登録しないといけないっぽいです。なので、App.xaml.csでMobileServiceClientをUnityに登録してる箇所を以下のようにhttpsに書き換えておきます。
this.Container.RegisterType<MobileServiceClient>(
    new ContainerControlledLifetimeManager(),
    new InjectionConstructor("https://customokazukitodoapp.azurewebsites.net", new HttpMessageHandler[0]));
実行して動作確認
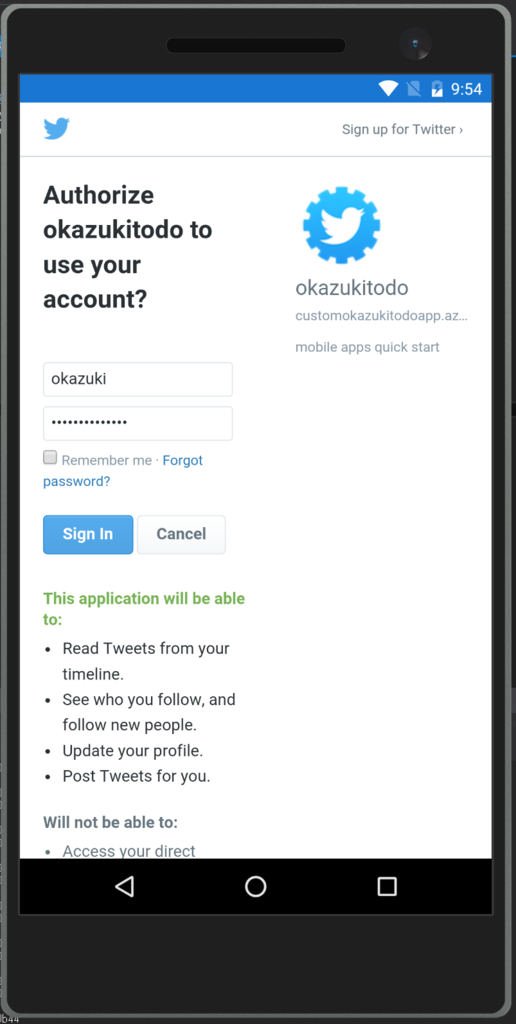
ログインボタンを押すと以下のように認証画面が開きます。

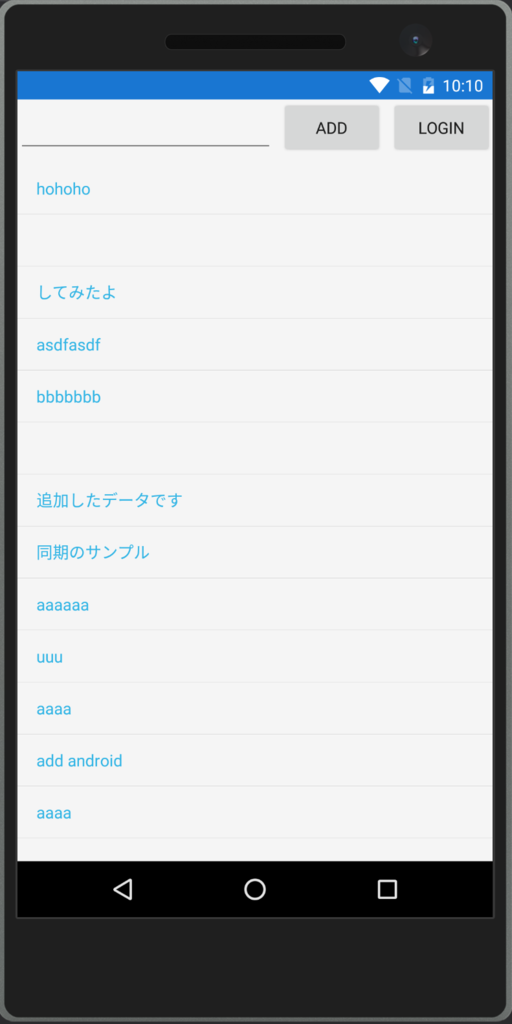
何かデータを追加するとデータが追加されてデータも取得できていることが確認できます。

残るは、プッシュ通知だけど、これは開発者登録してないとダメっぽいのでできないかな…(AppleもGoogleも開発者登録してない)