タイトルの通りです。因みにMSDNフォーラムの質問が元ネタです。
前にNPOIを使った記事を書いたりしましたが、それを使ってサーバーサイドでExcelのバイナリを作って転送してSilverlight側で保存すればいいんじゃないんだろうかというロジックです。
早速作ってみよう
まず、ExcelDownloadSampleという名前でSilverlightアプリケーションを作成します。もちろんWCF RIA Servicesは有効にしておきます。そしてDomainServiceを作成します。名前はExcelServiceにしておきました。
とりあえず、エンテティとしてPersonクラスを作成します。
/// <summary>
/// Entity
/// </summary>
public class Person
{
    [Key]
    [Display(AutoGenerateField = false)]
    public int ID { get; set; }

    [Display(Name = "名前")]
    public string Name { get; set; }

    [Display(Name = "誕生日")]
    public DateTime Birthday { get; set; }
}
そして、適当にテストデータを作って、それを取得するためのメソッドをサービスに作成します。
// sample data
private static readonly IEnumerable<Person> db = Enumerable.Range(1, 100)
    .Select(i =>
        new Person
        {
            ID = i,
            Name = "田中 太郎" + i,
            Birthday = DateTime.Now
        });

// get sample data
public IQueryable<Person> GetPeople()
{
    return db.AsQueryable();
}
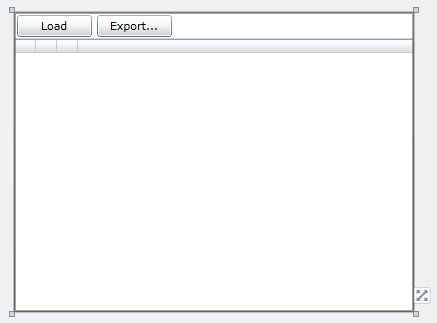
そして、画面をデザインします。適当に上にLoadボタンとExport...ボタンがあって残りはDataGridが置いてあるシンプルな画面にしました。
<UserControl x:Class="ExcelDownloadSample.MainPage"
    xmlns="http://schemas.microsoft.com/winfx/2006/xaml/presentation"
    xmlns:x="http://schemas.microsoft.com/winfx/2006/xaml"
    xmlns:d="http://schemas.microsoft.com/expression/blend/2008"
    xmlns:mc="http://schemas.openxmlformats.org/markup-compatibility/2006"
    mc:Ignorable="d"
    d:DesignHeight="300" d:DesignWidth="400" xmlns:sdk="http://schemas.microsoft.com/winfx/2006/xaml/presentation/sdk">
    <Grid x:Name="LayoutRoot" Background="White">
        <Grid.RowDefinitions>
            <RowDefinition Height="Auto" />
            <RowDefinition Height="254*" />
        </Grid.RowDefinitions>
        <StackPanel Name="stackPanel1" Orientation="Horizontal">
            <Button Content="Load" Name="buttonLoad" MinWidth="75" Margin="2.5" Click="buttonLoad_Click" />
            <Button Content="Export..." Name="buttonExport" MinWidth="75" Margin="2.5" Click="buttonExport_Click" />
        </StackPanel>
        <sdk:DataGrid Grid.Row="1" Name="dataGridPeople" IsReadOnly="True" AutoGenerateColumns="False">
            <sdk:DataGrid.Columns>
                <sdk:DataGridTextColumn Binding="{Binding ID}" />
                <sdk:DataGridTextColumn Binding="{Binding Name}" />
                <sdk:DataGridTextColumn Binding="{Binding Birthday, StringFormat=yyyy年MM月dd日}" />
            </sdk:DataGrid.Columns>
        </sdk:DataGrid>
    </Grid>
</UserControl>
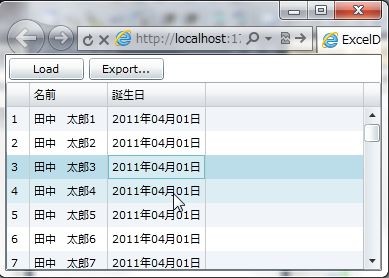
そして、コードビハインドでデータを取得してDataGridに表示します。今回はダウンロードが主目的なのでMVVMではなく、コードビハインドにべったり書きます。
public partial class MainPage : UserControl
{
    private ExcelContext context = new ExcelContext();

    public MainPage()
    {
        InitializeComponent();
    }

    private void buttonLoad_Click(object sender, RoutedEventArgs e)
    {
        // データを取得してきてDataGridに表示する
        context.Load(
            context.GetPeopleQuery(),
            op =>
            {
                this.dataGridPeople.ItemsSource = op.Entities;
            },
            null);
    }
}
いよいよ本題のExcelダウンロード
では、早速Excelのダウンロードの処理を書いていきます。全体をさくっと貼ります。クラス分けするのもめんどくさかったしサンプルなんでExcelServiceクラスの中にべったりと書いてます(悪)
// get excel binary
[Invoke]
public byte[] GetExecl()
{
    var book = CreateWorkbook(db);
    var ms = new MemoryStream();
    book.Write(ms);
    return ms.ToArray();
}

private static HSSFWorkbook CreateWorkbook(IEnumerable<Person> source)
{
    var book = new HSSFWorkbook();
    var sheet = book.CreateSheet("Person");

    CreateHeaderRow(book, sheet);
    foreach (var p in source.Select((person, index) => new { person, index }))
    {
        CreateRow(book, sheet, p.index + 1, p.person);
    }
    return book;
}

// ヘッダー行を作成する
private static void CreateHeaderRow(HSSFWorkbook book, Sheet sheet)
{
    var row = sheet.CreateRow(0);

    // 0列目はIDの列
    var idCell = row.CreateCell(0);
    idCell.SetCellValue("ID");

    // 1列目は名前の列
    var nameCell = row.CreateCell(1);
    nameCell.SetCellValue("名前");

    // 3列目は誕生日の列
    var birthdayCell = row.CreateCell(2);
    birthdayCell.SetCellValue("誕生日");

    // 4方に罫線
    var style = book.CreateCellStyle();
    style.BorderTop = CellBorderType.THIN;
    style.BorderLeft = CellBorderType.THIN;
    style.BorderBottom = CellBorderType.THIN;
    style.BorderRight = CellBorderType.THIN;

    // 薄いグリーンの背景色で塗りつぶす
    style.FillForegroundColor = IndexedColors.LIGHT_GREEN.Index;
    style.FillPattern = FillPatternType.SOLID_FOREGROUND;
    // テキストはセンタリング
    style.Alignment = HorizontalAlignment.CENTER;

    // 太字
    var font = book.CreateFont();
    font.Boldweight = (short)FontBoldWeight.BOLD;
    style.SetFont(font);

    // 全てのヘッダー用のセルに、上で作ったスタイルを適用する
    foreach (var cell in new[] { idCell, nameCell, birthdayCell })
    {
        cell.CellStyle = style;
    }

}

// index行目のデータを作る
private static void CreateRow(HSSFWorkbook book, Sheet sheet, int index, Person p)
{
    // 行を作って
    var row = sheet.CreateRow(index);

    // id列を作る
    var idCell = row.CreateCell(0);
    idCell.SetCellValue(p.ID);

    // 名前も適当に入れて
    var nameCell = row.CreateCell(1);
    nameCell.SetCellValue(p.Name);

    // 誕生日も適当に
    var birthdayCell = row.CreateCell(2);
    birthdayCell.SetCellValue(p.Birthday);

    // 全ての列に4方に罫線のあるスタイルを作って適用する
    // あえて別々のスタイルを設定してるのは、誕生日セルにフォーマットを入れるため
    foreach (var cell in new[] { idCell, nameCell, birthdayCell })
    {
        var style = book.CreateCellStyle();
        style.BorderTop = CellBorderType.THIN;
        style.BorderRight = CellBorderType.THIN;
        style.BorderLeft = CellBorderType.THIN;
        style.BorderBottom = CellBorderType.THIN;

        cell.CellStyle = style;
    }
    // 日付用yyyy年mm月dd日のフォーマットで誕生日は表示するようにする
    var format = book.CreateDataFormat();
    birthdayCell.CellStyle.DataFormat = format.GetFormat("yyyy年mm月dd日");
}
ほぼ、前に書いた記事のコードの使いまわしですが、細かいところでAPIに変更が入ってたりするので、このコードが今の所最新バージョンで動く感じです。Personのデータを純粋にExcelシートに書き込んで行って、最後にMemoryStreamに吐き出してbyte[]として返しています。Silverlight側の処理は以下のようになります。
private void buttonExport_Click(object sender, RoutedEventArgs e)
{
    // Excelファイルを保存する
    var dlg = new SaveFileDialog();
    dlg.Filter = "Excelファイル(*.xls)|*.xls|全てのファイル|*.*";

    // Dialogはユーザからの操作で開かせる必要があるのでここで開かせる
    if (dlg.ShowDialog() != true)
    {
        return;
    }

    context.GetExecl(
        op =>
        {
            // データの取得が終わったらファイルに書き込む
            using (var f = dlg.OpenFile())
            {
                f.Write(op.Value, 0, op.Value.Length);
            }
            MessageBox.Show("保存終了");
        },
        null);
}
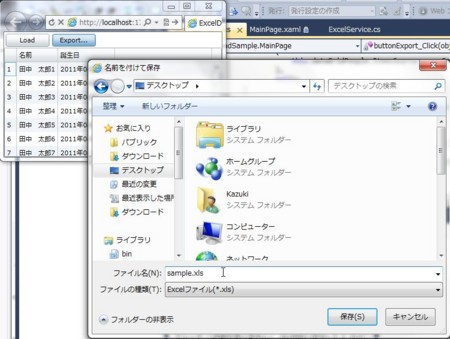
ポイントは、コメントにも書いてありますがボタンクリックのところで必ずファイルを開くダイアログを出すところです。じゃないとダイアログ開かせてくれません。
保存するファイルが選択されたら、サーバーからデータを取得して最後にファイルにデータを吐き出しています。
コードのダウンロード
このサンプルプログラムの完全なコードは以下からダウンロードできます。


