ちょっとSpring Bootを始めました。eclipseもMersになったことだし約4年ぶりくらいのeclipse生活です。JavaはもちろんJava 8!Stream使っていこうと思います。
さて、関係ない話はそれくらいにしてSpring Bootを始めたいと思います。
プロジェクトの作成
まず、プロジェクトを作成します。eclipseからさくっと。Maven Projectを作成します。
maven-archetype-quickstartを選び(デフォルトで選ばれているものです)何も考えずにNextして作成します。今回はgroupIdにhellobootを、artifactIdにsampleappを指定しました。
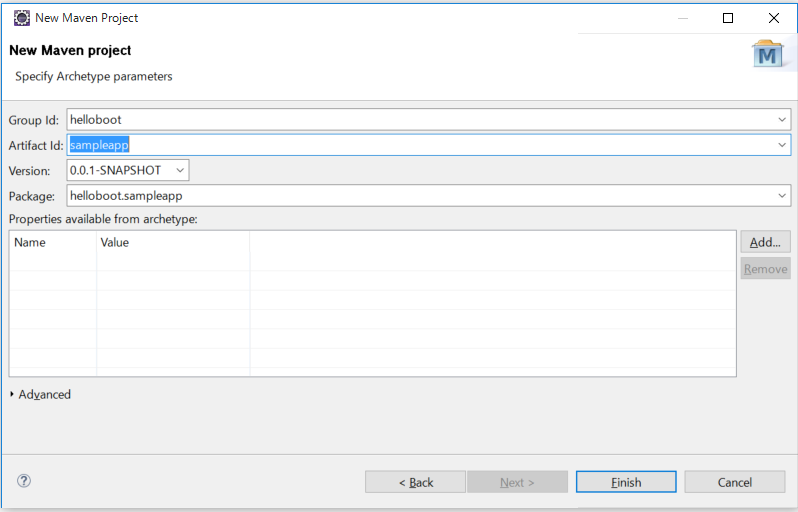
Spring BootのHPにある通りpom.xmlに以下の追記をします。
<parent>
    <groupId>org.springframework.boot</groupId>
    <artifactId>spring-boot-starter-parent</artifactId>
    <version>1.2.5.RELEASE</version>
</parent>
<dependencies>
    <dependency>
        <groupId>org.springframework.boot</groupId>
        <artifactId>spring-boot-starter-web</artifactId>
    </dependency>
</dependencies>
追記したpom.xmlは以下のようになりました。
<project xmlns="http://maven.apache.org/POM/4.0.0" xmlns:xsi="http://www.w3.org/2001/XMLSchema-instance"
    xsi:schemaLocation="http://maven.apache.org/POM/4.0.0 http://maven.apache.org/xsd/maven-4.0.0.xsd">
    <modelVersion>4.0.0</modelVersion>

    <groupId>helloboot</groupId>
    <artifactId>sampleapp</artifactId>
    <version>0.0.1-SNAPSHOT</version>
    <packaging>jar</packaging>

    <name>sampleapp</name>
    <url>http://maven.apache.org</url>
    <parent>
        <groupId>org.springframework.boot</groupId>
        <artifactId>spring-boot-starter-parent</artifactId>
        <version>1.2.5.RELEASE</version>
    </parent>
    <properties>
        <project.build.sourceEncoding>UTF-8</project.build.sourceEncoding>
    </properties>

    <dependencies>
        <dependency>
            <groupId>org.springframework.boot</groupId>
            <artifactId>spring-boot-starter-web</artifactId>
        </dependency>
        <dependency>
            <groupId>junit</groupId>
            <artifactId>junit</artifactId>
            <version>3.8.1</version>
            <scope>test</scope>
        </dependency>
    </dependencies>
</project>
Hello world
Spring Bootの設定とエントリポイントとなるAppクラスを作成します。
package helloboot.sampleapp;

import org.springframework.boot.SpringApplication;
import org.springframework.boot.autoconfigure.SpringBootApplication;

@SpringBootApplication
public class App {
    public static void main(String[] args) {
        SpringApplication.run(App.class, args);
    }
}
次にControllerクラスを作成します。
package helloboot.sampleapp;

import org.springframework.web.bind.annotation.RequestMapping;
import org.springframework.web.bind.annotation.RestController;

@RestController
public class HelloController {
    @RequestMapping("/")
    public String sayHello() {
        return "Hello world";
    }
}
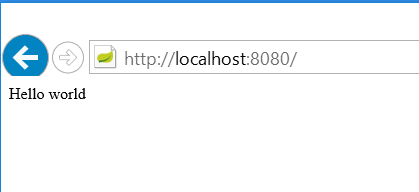
この状態でRun AsからJava Applicationを選択して先ほど作成したAppクラスから起動します。ブラウザを立ち上げてhttp://localhost:8080にアクセスすると以下のようにHello worldが表示されます。
Thymeleafを使う
次は名前を入力したら、こんにちは●●さん!と表示するフォームでも作ってみようと思います。とりあえず、Spring BootではThymeleaf使うのが王道?っぽいのでそれにならってみます。
pom.xmlに以下の定義を追加します。
<dependency>
    <groupId>org.springframework.boot</groupId>
    <artifactId>spring-boot-starter-thymeleaf</artifactId>
</dependency>
src/main/resourcesにtemplatesフォルダを作ってそこにテンプレートを置きます。まずは動作確認したいのでindex.htmlという名前で以下のファイルを置いてみました。
<!DOCTYPE html>
<html xmlns:th="http://www.thymeleaf.org">
<head>
<meta charset="UTF-8"/>
<title>Insert title here</title>
</head>
<body>
    <span th:text="${message}">Hello world</span>
</body>
</html>
そして、コントローラをViewを使うようにします。
package helloboot.sampleapp;

import org.springframework.stereotype.Controller;
import org.springframework.ui.Model;
import org.springframework.web.bind.annotation.RequestMapping;

@Controller
public class HelloController {
    @RequestMapping("/")
    public String sayHello(Model model) {
        model.addAttribute("message", "こんにちは世界");
        return "index";
    }
}
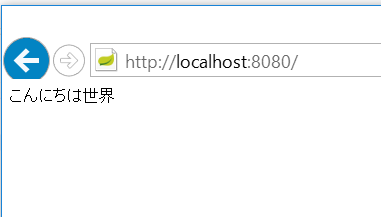
実行すると以下のようになります。
入力項目を足していきます。
<!DOCTYPE html>
<html xmlns:th="http://www.thymeleaf.org">
<head>
<meta charset="UTF-8"/>
<title>Insert title here</title>
</head>
<body>
    <span th:text="${message}">Hello world</span>
    <form action="/" method="POST">
        <input name="name" type="text" /><br/>
        <input type="submit" />
    </form>
</body>
</html>
POSTに対応するメソッドをControllerに追加します。
package helloboot.sampleapp;

import org.springframework.stereotype.Controller;
import org.springframework.ui.Model;
import org.springframework.web.bind.annotation.RequestMapping;
import org.springframework.web.bind.annotation.RequestMethod;
import org.springframework.web.bind.annotation.RequestParam;

@Controller
public class HelloController {
    @RequestMapping(name = "/", method = RequestMethod.GET)
    public String sayHello(Model model) {
        model.addAttribute("message", "こんにちは世界");
        return "index";
    }

    @RequestMapping(name = "/", method = RequestMethod.POST)
    public String createHelloMessage(@RequestParam("name") String name, Model model) {
        model.addAttribute("message", "こんにちは" + name + "さん");
        return "index";
    }
}
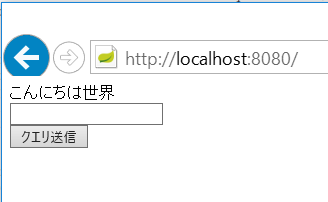
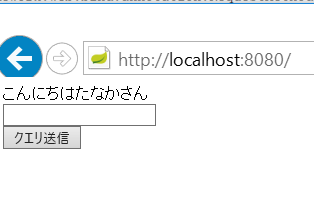
実行すると入力した名前が表示されます。
warファイル化
最後にwarファイルにして何処にでもデプロイできるように固めます。
pom.xmlのpackagingをjarからwarに変えます。
<packaging>war</packaging>
以下のdependencyを追加します。
<dependency>
    <groupId>org.springframework.boot</groupId>
    <artifactId>spring-boot-starter-tomcat</artifactId>
    <scope>provided</scope>
</dependency>
そして、サーブレット初期化子を追加してServletコンテナで起動したときにどのクラスが設定なんじゃっていうのを教えてあげます。
package helloboot.sampleapp;

import org.springframework.boot.builder.SpringApplicationBuilder;
import org.springframework.boot.context.web.SpringBootServletInitializer;

public class Initializer extends SpringBootServletInitializer {
    @Override
    protected SpringApplicationBuilder configure(SpringApplicationBuilder builder) {
        return builder.sources(App.class);
    }
}
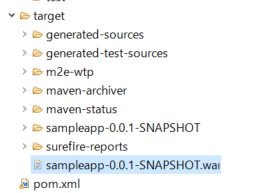
Run AsからMaven buildを選んでpackageゴールを実行すると以下のようにwarファイルが出来ました。
ついでなのでAzure WebAppsにデプロイ
以下のページを参考にやってみました。
WebAppsを作成して、構成でJavaを有効にします。

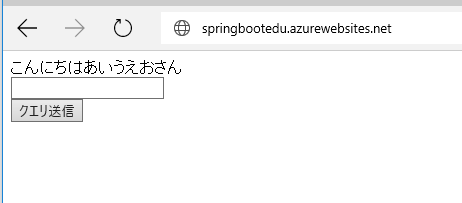
Java 7なのか…というのは置いといてFTPでsite/wwwroot/webappsの下のファイルを一旦削除して、ROOT.warという名前でwarファイルを置いてwebappsを再起動かけてURLにアクセスするといけてました。(正しい手順かは知らない)
めでたしめでたし。