サイトにアクセスするとログインページが出て、ログインするとメニューページに行くというものを作ってみようと思います。
プロジェクトの作成
プロジェクトを作ってpom.xmlを編集します。まずはSpring Boot使うためのお約束として以下のものを追加します。
<parent>
    <groupId>org.springframework.boot</groupId>
    <artifactId>spring-boot-starter-parent</artifactId>
    <version>1.2.5.RELEASE</version>
</parent>
<dependency>
    <groupId>org.springframework.boot</groupId>
    <artifactId>spring-boot-starter-web</artifactId>
</dependency>
<dependency>
    <groupId>org.springframework.boot</groupId>
    <artifactId>spring-boot-starter-thymeleaf</artifactId>
</dependency>
Java 8になるようにPropertiesにjava.versionも追記しておきます。
<java.version>1.8</java.version>
Spring Securityの追加
Spring Securityというものを使ってログインを実装するので以下のようにpom.xmlに依存関係を追加します。
<dependency>
    <groupId>org.springframework.boot</groupId>
    <artifactId>spring-boot-starter-security</artifactId>
</dependency>
<dependency>
    <groupId>org.thymeleaf.extras</groupId>
    <artifactId>thymeleaf-extras-springsecurity3</artifactId>
</dependency>
Appクラスの準備
通常のSpring Bootのエントリポイントのクラスを作成します。
package okazuki.authtest;

import org.springframework.boot.SpringApplication;
import org.springframework.boot.autoconfigure.SpringBootApplication;

@SpringBootApplication
public class App {
    public static void main(String[] args) {
        SpringApplication.run(App.class, args);
    }
}
認証用の設定
次に、認証関係の設定を行います。WebSecurityConfigurerAdapterを継承して以下のように書きます。
package okazuki.authtest;

import org.springframework.context.annotation.Configuration;
import org.springframework.security.config.annotation.web.builders.HttpSecurity;
import org.springframework.security.config.annotation.web.configuration.WebSecurityConfigurerAdapter;
import org.springframework.security.config.annotation.web.servlet.configuration.EnableWebMvcSecurity;

@Configuration
@EnableWebMvcSecurity
public class SecurityConfig extends WebSecurityConfigurerAdapter {
    @Override
    protected void configure(HttpSecurity http) throws Exception {
        // css, js, imagesは匿名アクセスOK
        http.authorizeRequests().antMatchers("/css/**", "/js/**", "/images/**").permitAll()
            // ADMIN roleじゃないと/adminには入れない
            .antMatchers("/admin").hasRole("ADMIN")
            // それ以外は匿名アクセス禁止
            .anyRequest().authenticated();
        // ログインは/loginでおこなってパラメータはusernameとpassword
        http.formLogin().loginPage("/login").usernameParameter("username").passwordParameter("password").permitAll().and();
        // ログアウトは/logout
        http.logout().logoutUrl("/logout").permitAll();
    }
}
コメントにあるように設定しています。流れるようなインターフェースですね。ちょっとこの感じの流れるインターフェースは好きになれないです。LINQは好きなんだけど。
メニューページの作成
まずメニューページを作成します。コントローラとビューをさくっと作ります。
package okazuki.authtest.controllers;

import org.springframework.stereotype.Controller;
import org.springframework.web.bind.annotation.RequestMapping;
import org.springframework.web.bind.annotation.RequestMethod;

@Controller
public class HomeController {
    @RequestMapping(value = "/", method = RequestMethod.GET)
    public String menu() {
        return "menu";
    }
}
<!-- menu.html -->
<!DOCTYPE html>
<html xmlns:th="http://www.thymeleaf.org">
<head>
<meta charset="UTF-8" />
<title>メニュー</title>
</head>
<body>
    <h1>Menu</h1>
    <a th:href="@{/admin}">管理ページ</a>
</body>
</html>
管理ページもさくっと追加します。HomeControllerにメソッドを追加してビューも作成します。
package okazuki.authtest.controllers;

import org.springframework.stereotype.Controller;
import org.springframework.web.bind.annotation.RequestMapping;
import org.springframework.web.bind.annotation.RequestMethod;

@Controller
public class HomeController {
    @RequestMapping(value = "/", method = RequestMethod.GET)
    public String menu() {
        return "menu";
    }

    @RequestMapping(value = "/admin", method = RequestMethod.GET)
    public String admin() {
        return "admin";
    }
}
<!-- admin.html -->
<!DOCTYPE html>
<html xmlns:th="http://www.thymeleaf.org">
<head>
<meta charset="UTF-8" />
<title>メニュー</title>
</head>
<body>
    <h1>Menu</h1>
    <a th:href="@{/admin}">管理ページ</a>
    <br/>

    <form method="post" th:action="@{/logout}">
        <input type="submit" value="サインアウト" />
    </form>
</body>
</html>
ログインページの作成
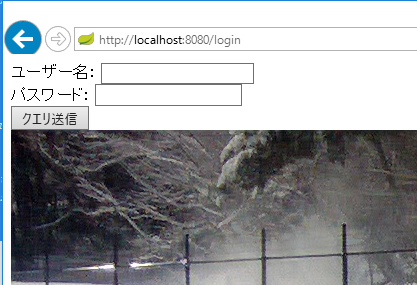
次にログインページを作成します。これもHomeControllerにメソッドを追加して適当な入力項目を持ったビューを作成します。ビューはパラメータ名をusernameとpasswordにする点に注意です。(上で設定したのに合わせる)
package okazuki.authtest.controllers;

import org.springframework.stereotype.Controller;
import org.springframework.web.bind.annotation.RequestMapping;
import org.springframework.web.bind.annotation.RequestMethod;

@Controller
public class HomeController {
    @RequestMapping(value = "/", method = RequestMethod.GET)
    public String menu() {
        return "menu";
    }

    @RequestMapping(value = "/admin", method = RequestMethod.GET)
    public String admin() {
        return "admin";
    }

    @RequestMapping(value = "/login", method = RequestMethod.GET)
    public String login() {
        return "login";
    }
}
<!-- login.html -->
<!DOCTYPE html>
<html xmlns:th="http://www.thymeleaf.org">
<head>
<meta charset="UTF-8"/>
<title>Insert title here</title>
</head>
<body>
    <form method="post" th:action="@{/login}">
        <label for="username">ユーザー名:</label>
        <input name="username" type="text" />
        <br/>

        <label for="password">パスワード:</label>
        <input name="password" type="password" />
        <br/>

        <input type="submit" />
    </form>
    <img th:src="@{/images/snow.jpg}" />
</body>
</html>
ログイン処理のカスタマイズ
ログイン処理のカスタマイズを行います。 GlobalAuthenticationConfigurerAdapterを継承してカスタマイズの設定を行います。
package okazuki.authtest;

import org.springframework.beans.factory.annotation.Autowired;
import org.springframework.context.annotation.Bean;
import org.springframework.context.annotation.Configuration;
import org.springframework.security.config.annotation.authentication.builders.AuthenticationManagerBuilder;
import org.springframework.security.config.annotation.authentication.configurers.GlobalAuthenticationConfigurerAdapter;
import org.springframework.security.core.userdetails.UserDetailsService;
import org.springframework.security.crypto.bcrypt.BCryptPasswordEncoder;
import org.springframework.security.crypto.password.PasswordEncoder;

@Configuration
public class AuthenticationConfiguration extends GlobalAuthenticationConfigurerAdapter {
    // ユーザー情報を取得するサービス
    @Autowired
    UserDetailsService userDetailsService;

    // パスワードの暗号化方式
    @Bean
    PasswordEncoder passwordEncoder() {
        return new BCryptPasswordEncoder();
    }

    @Override
    public void init(AuthenticationManagerBuilder auth) throws Exception {
        // ユーザーの情報の取得方法とパスワードのエンコード方式を設定
        auth.userDetailsService(this.userDetailsService).passwordEncoder(passwordEncoder());
    }
}
UserDetailsServiceはSpring側で用意されてるインターフェースになります。こいつを実装します。
package okazuki.authtest.services;

import java.util.ArrayList;
import java.util.List;

import org.springframework.beans.factory.annotation.Autowired;
import org.springframework.security.core.GrantedAuthority;
import org.springframework.security.core.authority.SimpleGrantedAuthority;
import org.springframework.security.core.userdetails.User;
import org.springframework.security.core.userdetails.UserDetails;
import org.springframework.security.core.userdetails.UserDetailsService;
import org.springframework.security.core.userdetails.UsernameNotFoundException;
import org.springframework.security.crypto.password.PasswordEncoder;
import org.springframework.stereotype.Service;

@Service
public class UserDetailsServiceImpl implements UserDetailsService {

    @Autowired
    PasswordEncoder passwordEncoder;

    @Override
    public UserDetails loadUserByUsername(String username) throws UsernameNotFoundException {
        if ("admin".equals(username)) {
            List<GrantedAuthority> authorities = new ArrayList<>();
            authorities.add(new SimpleGrantedAuthority("ROLE_USER"));
            authorities.add(new SimpleGrantedAuthority("ROLE_ADMIN"));
            return new User(username, this.passwordEncoder.encode("admin"), authorities);
        }

        if ("user".equals(username)) {
            List<GrantedAuthority> authorities = new ArrayList<>();
            authorities.add(new SimpleGrantedAuthority("ROLE_USER"));
            return new User(username, this.passwordEncoder.encode("user"), authorities);
        }

        // ユーザーが見つからなかった
        throw new UsernameNotFoundException(username);
    }

}
loadUserByUsernameでUserクラスを返します。みつからないときはUsernameNotFoundExceptionを返します。今回はadminとuserという2つのユーザーがあるという感じです。ロール名は自動でROLE_で始まるというルールみたいなのでつけてます。
実行して動作確認
これでひとまず完成です。実行してページにアクセスするとログイン画面が表示されます。画像はちゃんとログインしなくても表示されてることも確認できます。
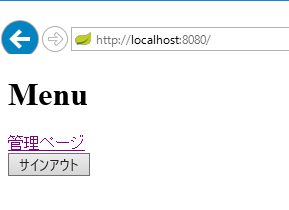
user/userでログインするとちゃんとログインできます。
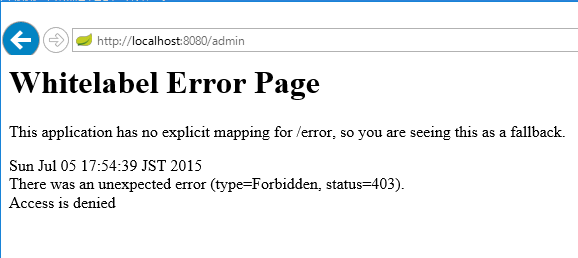
管理ページにはアクセスできません。
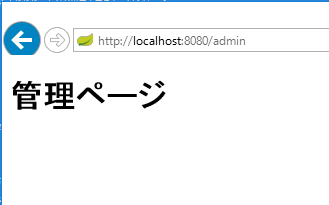
一旦サインアウトしてadmin/adminでログインすると、管理ページにアクセスできます。
セキュリティ関連のThymeleaf機能
Thymeleaf + Spring Security integration basics - Thymeleaf: java XML/XHTML/HTML5 template engine
こんなのもあります。例えば一般ユーザーで入った時に管理ページのリンクがあるのはおかしいです。一般ユーザーで入った時には管理ページへのリンクを出さないようにしてみます。
<!DOCTYPE html>
<html xmlns:th="http://www.thymeleaf.org" xmlns:sec="http://www.thymeleaf.org/thymeleaf-extras-springsecurity4">
<head>
<meta charset="UTF-8" />
<title>メニュー</title>
</head>
<body>
    <h1>Menu</h1>
    <div sec:authorize="hasRole('ROLE_ADMIN')">
        <a th:href="@{/admin}">管理ページ</a>
    </div>
    <br />

    <form method="post" th:action="@{/logout}">
        <input type="submit" value="サインアウト" />
    </form>
</body>
</html>
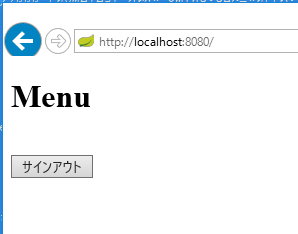
これで普通のユーザーで入った時にはリンクが表示されなくなります。
ユーザー情報をサーバーで使用する
Principalを引数で受け取って、AuthenticationにキャストしてgetPrincipalで取得できます。
@RequestMapping(value = "/", method = RequestMethod.GET)
public String menu(Principal principal, Model model) {
    Authentication auth = (Authentication)principal;
    User user = (User)auth.getPrincipal();
    model.addAttribute("username", user.getUsername());
    return "menu";
}
こんな感じで。